


To learn how to install pavers for a pedestrian patio or walkway, measure the area, establish drainage, excavate, build a compacted base, install edging, screed sand, and place and finish the pavers. A slope of about 1 inch over 8 feet can guide water away from the house, although the correct grade depends on the site and drainage plan.
This guide explains a practical seven-stage installation process for a residential project: planning, excavation, base preparation, edge restraint, bedding sand, paver placement, and joint finishing. The method focuses on a stable base, a uniform 1-inch layer, consistent joints, and a level surface. Follow the product instructions and confirm the recommended base material before beginning.
Each 24×24 concrete paver can provide a durable surface for ordinary foot traffic when installed over suitable soil and a properly compacted base. If one paver becomes damaged, you can generally remove and replace that unit instead of rebuilding the entire area. Proper joints may also help manage water, but drainage depends primarily on grading and the underlying base.
For homeowners planning a patio, walkway, or lawn transition in a Connecticut yard, use this guide as a planning resource. Review the patio construction guide before starting the installation.
Key Takeaways
- A stable, compacted base supports lasting pavers.
- A uniform 1-inch bedding layer helps maintain an even layout.
- Consistent joints improve alignment and may support drainage.
- A gentle slope directs water away from the house.
- Modular pavers allow individual repairs after damage.
What Is the Quick Answer for Installing 24×24 Pavers?
For a typical pedestrian installation, follow these seven steps: 1) measure and mark the area; 2) call 811 and excavate; 3) install and compact the crushed-stone base; 4) secure the edge restraints; 5) screed about 1 inch of bedding sand; 6) place the 24×24 pavers; and 7) fill the joints, compact the surface, and seal only when appropriate. Keep the finished project sloped away from the house for drainage and long-term support.
Patios and walkways commonly need about 3 to 4 inches of compacted base beneath the sand and concrete pavers, but the required depth depends on soil, drainage, climate, and the expected load. A driveway generally needs about 4 to 5 inches of base because vehicles apply greater pressure. A properly prepared base helps limit shifting, cracking, and uneven settling.
Set the drainage grade at roughly 1/8 to 1/4 inch per foot away from the house. This fall helps prevent standing water across the area. Calculate the total excavation by adding the paver thickness, approximately 1 inch of bedding sand, and the required compacted base. Place each paver directly onto the screeded sand; never drag, tilt, or slide it across the prepared layer.
Before excavation, contact 811 for utility marking, as notification requirements vary by state. Private utility lines may require a separate locating service. Wear gloves and protective eyewear while digging, cutting, and handling material. Use appropriate dust-control methods when working with dry masonry products.
How to Install Pavers for a 24×24 Patio?
Measure the patio area before ordering product. Confirm that each unit measures 24 by 24 inches, calculate the square footage, and account for joints, edge restraints, cuts, and waste. If you plan to start laying pavers along a house or another structure, verify that the reference edge is straight and that the planned slope will direct water away from it.
Gather every tool and material before the project begins. A patio layout guide can provide additional planning instructions, including ways to estimate the number of pavers and organize the installation.
Tools and Materials for the Project
- Tools: circular saw with masonry blade, plate compactor, rubber mallet, shovel, rake, wheelbarrow, level, string line, gloves, goggles, and dust mask.
- Materials: crushed stone or Class II Road Base, clean bedding sand, joint sand, edge restraints, and concrete units. Confirm that the selected base material and sand meet the product manufacturer’s recommendations.
- Place the base in firm lifts, compact each lift with the appropriate compactor, and use a screed for a smooth bedding layer. Check the level at each corner and along the edges before placing the pavers.
Extra Material Planning
Order 10%–15% extra pavers for perimeter cuts, breakage, irregular edges, and future repairs. Use the supplier’s coverage data when ordering base and sand because actual quantities vary with compaction and site conditions. One cubic yard of base covers about 108 square feet at a 3-inch depth. One cubic yard of sand covers about 300 square feet.
| MaterialCoverage guidePlanning note | ||
| Base material | 108 sq. ft. per cubic yard | Based on 3-inch depth |
| Bedding sand | 300 sq. ft. per cubic yard | Allow for a uniform layer |
| Concrete pavers | 10%–15% extra | Handles cuts and breakage |
How Should You Plan the Paver Layout and Drainage?
Start by establishing the highest control point near the house, then set a consistent fall away from the structure before excavating. A planned layout keeps the pavers, base, sand layer, and finished surface at the correct level. Check the grade during excavation, base preparation, screeding, and placement so water does not collect beside the house.
Using Stakes and a String Line
Outline the installation area with stakes, white marking paint, string, or a garden hose before disturbing the soil. Place the highest stake near the front door or the side closest to the house. This stake becomes the reference point for the base and finished surface.
Attach a line level to the string and extend it across the area. Add cross-lines across the patio, then check each line with a level. To create a fall, mark the lower stake approximately 1/8 to 1/4 inch lower for every foot of distance from the house. Repeat measurements at several points to keep the sand layer and pavers even across irregular ground.
Creating a Slope Away From the House
Plan a drainage fall of 1/8 to 1/4 inch per foot. The lower value is about a 1% slope, while the higher value is about 2%. A practical target for many patios is 1 inch over 4 feet, which equals a 2% slope. Across an 8-foot area, the outer edge would sit about 1 to 2 inches lower than the house-side reference point, depending on the selected grade.
Use a straightedge and a marked string line to verify the fall before placing the concrete units. Keep the edge restraints and edging secure so water can move away without pooling. If grading could direct runoff toward a foundation, neighboring property, or drainage system, ask a qualified professional to review the plan before changing the site.
What Should Connecticut Homeowners Know About Soil and Climate?
Connecticut’s New England climate includes freeze-thaw cycles that can shift patios and strain concrete surfaces. Drainage and firm compaction matter because water trapped in the soil can expand when temperatures fall. The correct preparation depends on the site, soil type, intended load, and local requirements.
Clay soil holds water beneath pavers. That condition can cause heaving, settlement, saturated sand, and damaged joints. A site review may show the need to remove soft soil or improve drainage before beginning the project.
Sandy soil drains faster, yet runoff can wash soil from the area. Geotextile fabric between the soil and base may improve separation and limit erosion when recommended for the site. A perforated drainage pipe beneath the base can help where water remains after rain, but it is not necessary for every yard and should be designed for actual site conditions.
For severe weather exposure, check whether the selected paver product has an appropriate freeze-thaw rating, such as SX where the manufacturer specifies it. Protect nearby cool-season grass with covers or temporary paths. Keep excavated soil, muddy runoff, and equipment away from the lawn and house. Review this quality paver base guide before starting the project.
How Deep Should You Excavate for a Paver Base?
Excavate deeply enough to accommodate the concrete paver thickness, approximately 1 inch of bedding sand, and the required compacted base. The correct excavation depth depends on traffic, soil, drainage, climate, and the finished grade. Measure from the planned surface down to the stable subgrade rather than relying on one depth for every project.
Pedestrian and Driveway Excavation Requirements
Walkways and patios commonly need about 6–8 inches of total excavation when using 3–4 inches of compacted base beneath a 1-inch sand layer and standard concrete pavers. Driveways often need about 8–12 inches of excavation, with approximately 4–5 inches of base material for vehicle loads. These are planning ranges, not universal requirements; local soil and product instructions may call for a different depth.
Distinguish total excavation depth from compacted base depth. Excavation includes the pavers, bedding sand, and base, while the base measurement describes only the aggregate after it has been compacted. Extend the excavation 6–12 inches beyond the paver edges so the edge restraints have firm support. Remove organic, loose, saturated, or unstable soil instead of using it as part of the foundation.
- Mark the boundary with string and a level line.
- Check the depth at each step and corner across the area.
- Keep removed soil away from water flow paths and the house.
- Place the base in multiple lifts and use a plate compactor after each lift.
Handling Clay Soil and Poor Drainage
Clay soil can hold water and shift during freeze-thaw cycles. If the subgrade remains soft or standing water persists, the project may need additional excavation, approved drainage stone, geotextile separation, or a perforated drainage pipe beneath the base material. Do not place sand over wet or unstable ground, and do not compact saturated clay. Allow it to drain or obtain professional advice before continuing. A stable subgrade gives the pavers a level foundation over time.
How Do You Build a Stable, Compacted Base?
A durable base begins with suitable aggregate, controlled moisture, and careful compaction. The prepared area must support the finished paver surface without soft spots, rocking units, or sudden settlement. Before adding material, confirm the subgrade follows the planned slope and is firm across the entire installation.
Choosing Crushed Stone Base Material
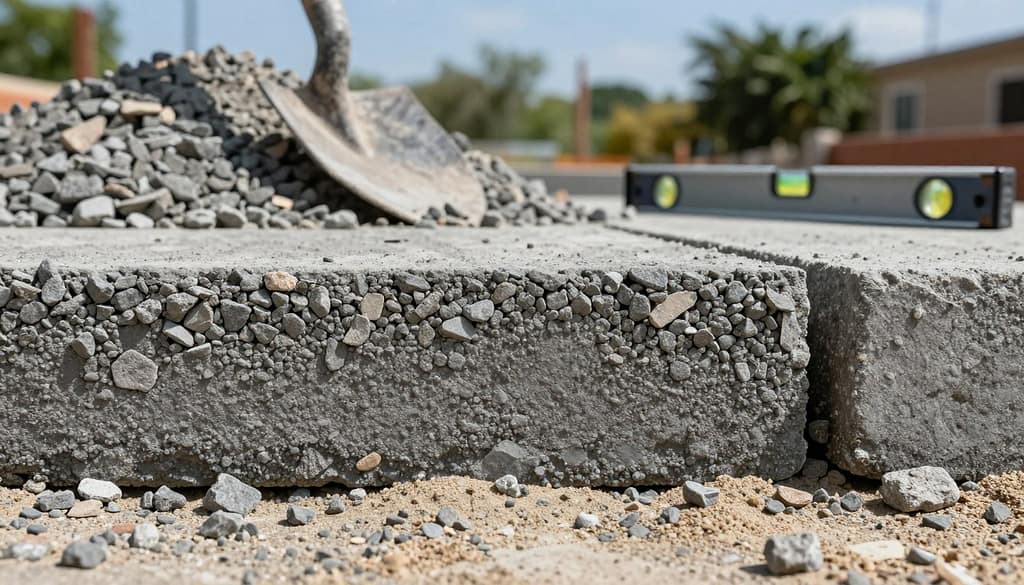
Use Class II Road Base or another well-graded blend of crushed stone and stone dust approved for the installation. Mixed particle sizes can lock together during compaction while allowing controlled drainage beneath the pavers. Do not automatically reject recycled concrete, but verify its cleanliness, gradation, drainage performance, and suitability with the aggregate supplier and paver manufacturer. Fine material or unsuitable fill may restrict drainage and contribute to surface efflorescence.
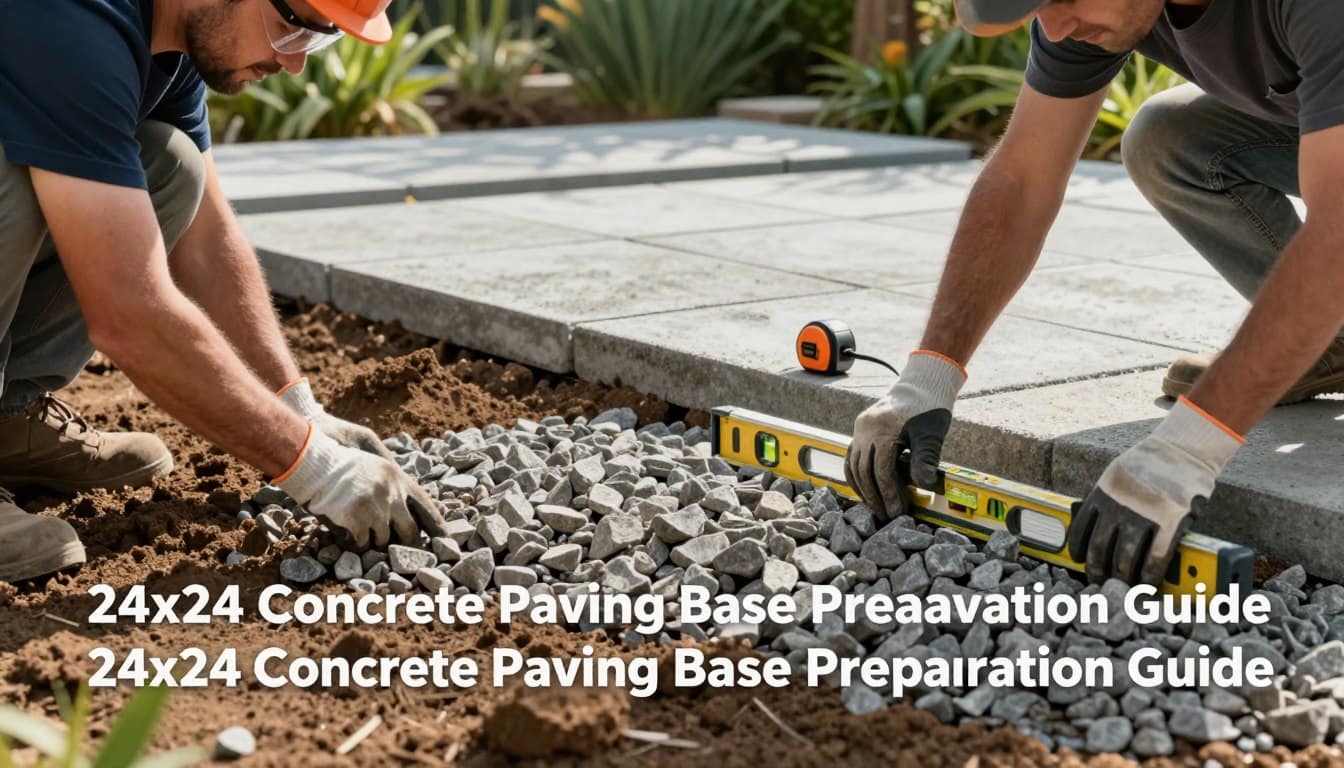
Spread the base in conservative lifts of approximately 2–3 inches, or follow the aggregate supplier’s stated maximum lift for the available compactor. Compacting thinner layers helps the plate reach the full depth of the material. Keep the final base grade slightly below the planned bedding sand, and check the depth and slope before adding the next layer.
Compact Base Layers With a Plate Compactor
Run a vibrating plate compactor across every base layer in several overlapping passes, changing direction between passes when practical. Use only light moisture when the material instructions permit it; the base should be damp enough to control dust, not saturated. Check the level and grade often, then correct dips or soft spots before adding more material. Give extra attention to edges and corners, where a small gap can weaken the installation. A firm, even compacted base helps the sand remain uniform and keeps the concrete pavers supported.
Compacted Base Depth Comparison Table
| UseCompacted base depthTypical load | ||
| Pedestrian | 3–4 inches | Walkways and patios |
| Vehicular | 4–5 inches | Cars and light trucks |
| Large vehicle | 6–8 inches | Motor homes and heavy loads |
How Do You Install Paver Edge Restraints?
Install and align the edge restraints after compacting the base and before laying pavers. A secure border prevents the pavers and bedding sand from spreading, protects the joints, and helps the patio keep its shape through foot traffic and seasonal movement. Set the finished restraint so it supports the edge without creating a trip hazard.
Choose the edging according to the project shape, soil, expected load, and local climate. Flexible polyethylene edging suits curves and can be secured with long landscape spikes. Aluminum provides a clean, low-profile edge, while steel offers greater strength. Existing walls and concrete curbing can create firm edges for straight layouts, but confirm that they are stable and correctly aligned before using them as the boundary.
- Drive long spikes through manufactured edging and into the compacted base.
- Use the manufacturer’s recommended spike spacing, with closer spacing along curves and exposed corners.
- Select metal edging when the installation needs clean lines and additional resistance to movement.
- Consider cobblestone or concrete-backed brick when the project requires a permanent edge.
For a lasting project in Connecticut, confirm any recommendation attributed to Roger Cook before applying it to your site. Cobblestone, concrete-backed brick, or steel may provide more support than basic plastic edging in areas exposed to frost movement, but the best product depends on the soil and load. Verify the claim that a concrete restraint should measure at least 8 inches wide by 7 inches deep with the supplier or designer. Set each edge firmly before placing the paver surface, then check alignment along the full installation.
How Should You Screed the Bedding Sand?
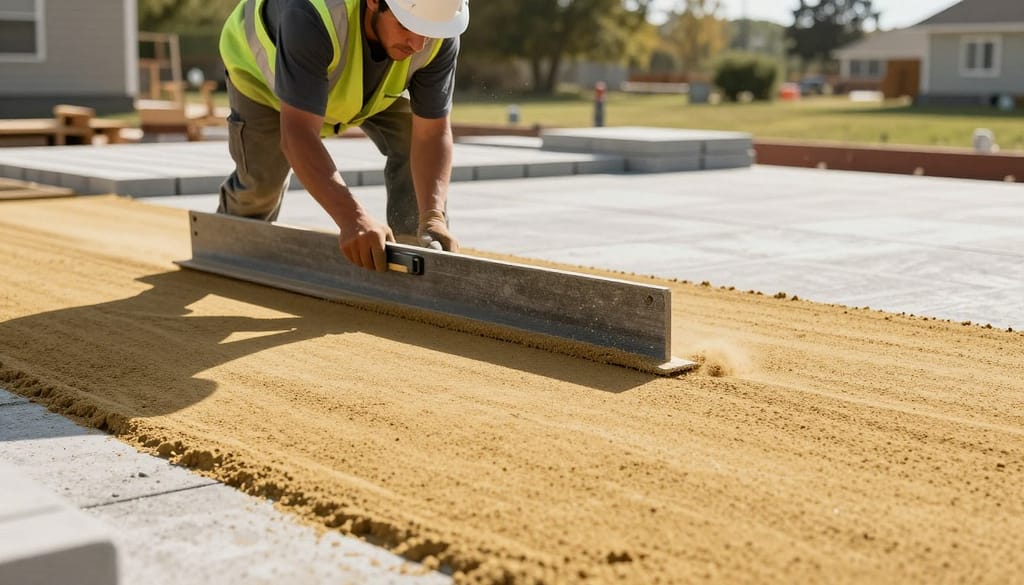
A smooth bedding course gives large concrete units a stable setting surface. After base compaction, spread clean, sharp masonry sand across the area. Confirm that the selected sand is approved for the paver system, and keep the sand layer near a uniform 1 inch depth.
Creating a Uniform Sand Layer
Place two 10-foot pipes with a 1-inch outside diameter on the compacted base. Set them about 6 feet apart, or adjust the spacing so the screed board remains supported and manageable. Add sand between and slightly above the pipes.
Rest a straight 2×4 across both pipes. Pull it toward you with a steady side-to-side motion to create an even surface. Repeat this screed step until the sand looks uniform. Check the grade with a level, then remove each pipe. Fill the channels with loose sand and lightly smooth them. At corners, use a shorter straightedge or hand tool without disturbing the surrounding layer.
Why You Should Not Disturb Screeded Sand
Do not add water to the bedding layer or use a compactor on this cushion. Controlled moisture may be appropriate during base compaction, but the prepared sand should remain dry and undisturbed. Walking across it creates dips that can transfer into the finished paver surface. Place the units from an exposed edge and work from firm ground whenever possible. One cubic yard covers about 300 square feet. For a complete step-by-step installation guide, review each stage before beginning.
How Do You Start Laying Pavers in a Straight Pattern?
To start laying pavers accurately, begin along the longest straight edge or at a 90-degree control corner. The first row determines the alignment of the entire installation, so take time to position it correctly rather than trying to correct the pattern at the final edge. A firm house edge, border, or string line can provide a useful reference.
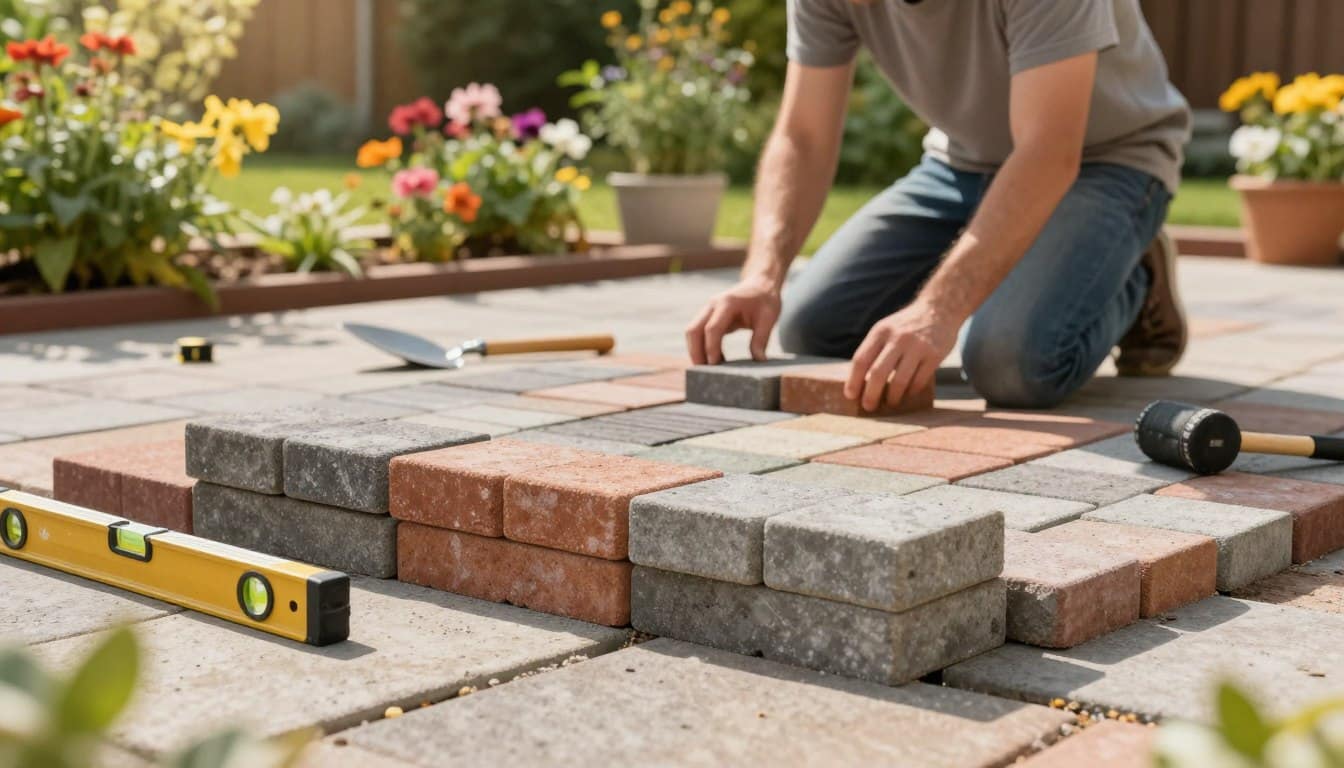
Place each 24×24 paver flat and straight down onto the prepared sand. Do not drag, tilt, or slide the unit across the layer because movement can create low spots beneath the surface. Large concrete pavers may be heavy and awkward to handle, so use two people or suitable lifting equipment when necessary. Follow this straight patio layout guide for additional planning support.
Maintaining Consistent Joints and Alignment
Keep joints near 1/8 inch when that spacing matches the paver manufacturer’s instructions. Molded spacer nibs can help maintain a consistent joint, while units without nibs may be set hand-tight if the product allows it. Do not force concrete pieces together or assume every paver requires the same joint space.
Stretch a string line across several feet after every few rows. Check the line and use a level to identify drifting corners, uneven pieces, or a row that is moving away from the starting edge. Measure the joint space before placing the next row and correct alignment immediately while the pavers can still be adjusted.
- Keep each row parallel with the starting edge or control line.
- Check joint space and surface level before adding the next row.
- Protect the prepared sand from foot traffic and equipment.
Choosing a Running Bond or Herringbone Pattern
A running-bond pattern uses offset joints and may require fewer cuts, making it a practical choice for many patio layouts. However, confirm that the selected 24×24 pavers and manufacturer allow this pattern. A herringbone pattern can provide stronger visual movement and may improve interlock in some installations, but it requires more fitting, careful alignment, and additional material. Dry-place several pieces first to confirm how the pattern meets each corner and edge.
Choose the pattern according to the project shape, expected traffic, available paver material, and manufacturer instructions. If a professional source recommends a running bond, verify that recommendation for the specific product rather than applying it to every installation.
How Do You Cut 24×24 Pavers for Clean Edges?
Clean perimeter cuts create finished edges around structures and borders. Complete the layout with whole units first, then measure each edge piece individually because a house, walkway, or retaining wall may not be perfectly square. Mark the cut only after accounting for the planned joint space, edge restraint, and any concrete border.
Use a wet masonry saw with a diamond blade when possible for controlled, accurate cuts and better dust management. A stable work surface keeps the paver steady and protects the prepared sand. Cut away from the installation area so dust and slurry do not settle on the base or finished surface.
A block splitter may handle simple cuts, but it offers less control and can produce rougher edges. A masonry saw is generally better for a narrow edge, angled cut, corner, or irregular shape. Follow this concrete cutting guide for additional safety details.
- Wear gloves, goggles, hearing protection, and a suitable dust mask.
- Keep hands clear of the diamond blade and follow the saw instructions.
- Check every cut against the string line before placement.
- Set finished pieces firmly against the restraint without forcing them.
Place all whole pavers first, then cut the perimeter pieces for clean transitions around structures, corners, and edges.
How Do You Compact Pavers and Fill the Joints?
After the full field of pavers is in place and level, sweep a light coat of dry joint sand across the surface. Make an initial pass with a plate compactor fitted with a manufacturer-approved protective mat. This compaction step helps settle each paver, improves contact between the units, and begins filling the joints without damaging the concrete faces or disturbing the base.
Using a Plate Compactor With a Protective Mat
Fit a rubber protective mat beneath the plate compactor before crossing the finished pavers. The mat helps reduce scuffs, chips, and surface marks. Use the compactor only after checking that the pavers are properly aligned and the surface is clean. After the first pass, spread about 1/4 inch of dry joint sand over the area, then sweep it across the surface until the sand fills the joints.
Run the plate compactor two or three times during final compaction, using overlapping passes and following the equipment instructions. Stop when the units no longer settle noticeably. Inspect the joints after each pass, add more joint sand where gaps remain, and repeat the sweep-and-compaction step as needed. Keep the pavers, joint sand, and surface clean and dry during this stage. Do not use a compactor on the bedding sand before the pavers are installed.
Choosing Masonry or Polymeric Joint Sand
Ordinary masonry sand may suit a basic project and remains loose in the joints. Polymeric sand is a different material: its binders form a firmer joint after the sand is properly installed and lightly misted with water. It may help reduce weed growth, insect activity, and washout, but it cannot correct poor base preparation or inadequate drainage. Do not substitute one product for the other without confirming that it is suitable for the pavers.
Keep the field dry before applying polymeric sand. Sweep the product into completely filled joints, remove excess material from the paver surface, and use only the amount of water specified by the product instructions. Lightly mist in controlled passes rather than washing the sand out of the joints. Plan for two or three rain-free days only when the manufacturer recommends that curing period; weather, temperature, and product requirements may differ. Do not seal the pavers until the joint sand has cured and the surface is ready for the sealer.
How Do You Seal and Maintain a Finished Paver Surface?
Sealing is optional for many paver installations. A compatible sealer may reduce stains, support joint sand, enhance color, and protect pavers near pools or high-use areas. Before choosing a product, consider the surface type, sun exposure, slip resistance, maintenance time, and manufacturer requirements. A sealer cannot replace proper compaction, full joints, or a stable base.

When Paver Sealing Makes Sense
Clean the surface fully, remove residue from the pavers and joints, and let the installation dry completely. Apply the product with a garden sprayer or roller, following the manufacturer’s instructions. Review these paver sealing tips before work begins. Resealing may suit a busy yard every few years, but use the product label rather than an assumed schedule. Test a small area first because sealed pavers can become slippery when wet.
- Use the manufacturer-approved polymeric sand in joints to help limit weeds and ants.
- Treat efflorescence with a compatible specialized cleaner after checking the product instructions.
- Reset sunken pavers by removing the affected units and repairing the base.
- Sweep, rinse, and inspect the edging and surface each season.
- Use sand or cat litter in winter instead of harsh deicers that may damage concrete.
Common Maintenance Questions
Does polymeric sand prevent weeds? It can greatly reduce growth when the joints are correctly prepared and the product is properly installed, but it is not a permanent guarantee. Is sealing required? No; sealing remains an optional maintenance step. A sunken 24×24 paver usually needs removal, base repair, and careful resetting. For drainage, grading, or a large installation beyond your available time or equipment, contact ctlawn.net for a professional quote. To find ctlawn.net’s service area, use Google Maps.
Conclusion
A durable paver installation starts below the visible pattern. Proper excavation, drainage, suitable base material, and firm compaction give 24×24 pavers reliable support. In Connecticut, freeze-thaw weather makes soil checks and water management especially important for every yard.
Keep the bedding sand near 1 inch and leave the screeded layer undisturbed before you place the pavers. Install edge restraints first, maintain the joint space recommended for the product, and measure perimeter pieces individually. These steps help the finished surface remain level and reduce premature movement.
After installation, use controlled final compaction, inspect the joints each season, sweep loose sand, and repair small shifts early. Use sand or cat litter for winter traction rather than harsh deicers that may damage concrete or affect the surface.
Request a professional paver installation or drainage assessment from ctlawn.net when grading, drainage correction, or the size of the project exceeds your available tools or time. You can also find ctlawn.net’s service area on Google Maps. Thoughtful preparation and regular maintenance help finished pavers stay attractive and stable for years.
Meta title: How to Install 24×24 Concrete Pavers: Base, Sand & Spacing Guide