


It looks like a giant comb, but use it wrong and you’ll end up with a lumpy lawn and a sore back. This versatile implement is one of the most valuable tools for creating smooth, level, and beautiful outdoor spaces. Many property owners underutilize or misuse their landscaping rake. This leads to subpar results and unnecessary frustration. Moving beyond a simple “leaf raking” mindset is key to professional grading.
This guide uncovers the five most common errors people make with this equipment. We provide clear, actionable fixes for each issue. Mastering these techniques can save significant time and effort.
You can achieve professional-level outcomes for lawns, gardens, and driveways. Whether you have a handheld model or a tractor attachment, the core principles remain the same.
By the end, you’ll have the knowledge to avoid common pitfalls. Your yard will look more beautiful and well-maintained.
Key Takeaways
- The landscape rake is essential for creating smooth, level surfaces.
- Common mistakes lead to poor results and wasted effort.
- Proper technique transforms yard maintenance and landscaping projects.
- Fixes are provided for the five most frequent errors.
- Mastery saves time and yields professional-grade outcomes.
- The principles apply to both handheld and tractor-mounted tools.
- Avoiding these mistakes ensures a more beautiful outdoor space.
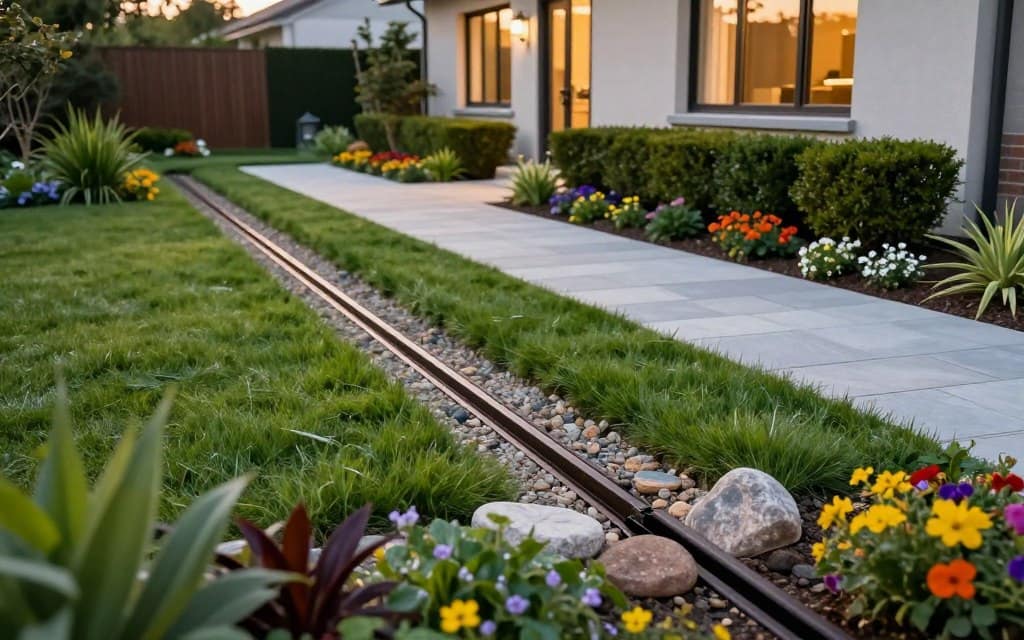
Why Your Landscaping Rake Is a Secret Weapon for a Beautiful Yard

Forget everything you know about traditional rakes. This tool is designed for grading, spreading, and finishing with precision.
It transforms from a simple implement into a multifunctional powerhouse. The equipment goes far beyond gathering leaves to become a cornerstone of yard care.
You save considerable time by covering large areas quickly. Leveling soil for a new garden bed or spreading gravel for a driveway becomes efficient.
Precision is another major benefit. Creating smooth, even surfaces is crucial for laying sod or seeding a lawn.
These surfaces are also vital for installing hardscape features. The right technique yields professional-grade outcomes.
Versatility defines this piece of equipment. It handles various materials like soil, sand, gravel, and mulch.
This makes it a single solution for numerous projects. You avoid switching between different tools constantly.
Correct application elevates the quality of your work. Outdoor spaces gain a polished, professional appearance.
That polished look significantly enhances your home’s curb appeal. It creates inviting and well-maintained areas.
Contrast its efficiency with manual raking and leveling. A tractor-mounted version completes tasks in a fraction of the time.
Shovels and hand rakes are labor-intensive by comparison. The modern landscape rake improves both speed and accuracy.
Understanding its full potential unlocks true value. This knowledge turns basic equipment into a secret weapon.
You achieve a beautiful, well-maintained yard with less effort. Mastery of this tool delivers outstanding results every time.
What Is a Landscaping Rake, and What Should You Use It For?

Often mistaken for its leaf-gathering cousin, the landscape rake is a heavy-duty implement built for moving earth, not just foliage. This robust tool features a wide head with strong, often flexible tines. These tines are designed for moving, leveling, and grading various materials across large areas.
It is distinct from a standard garden rake. The garden version is lighter and meant for finer work. A true landscape rake handles heavier loads with greater efficiency.
There are two primary types of this equipment. Lightweight handheld models are perfect for smaller residential projects. Heavy-duty tow-behind rakes attach to tractors for large-scale land management.
Understanding this difference is crucial. Selecting the correct type ensures the job gets done properly. It also prevents unnecessary strain on the operator.
Key Tasks for a Landscaping Rake
This tool excels at leveling and grading soil or gravel. Creating a smooth, even surface is essential for construction or planting. The wide tines distribute material uniformly for a professional finish.
Debris removal is another primary function. It efficiently gathers rocks, sticks, roots, and leaves from surfaces. Clearing lawns, gardens, and fields becomes a much faster process.
Soil preparation for planting is a key application. The tines break up clumps and remove small obstacles. This action creates a lightly tilled seedbed for optimal seed-to-soil contact.
Lawn dethatching is an important task for healthy grass. The tool pulls up layers of dead grass, known as thatch. This allows water, air, and nutrients to reach the soil and promote new growth.
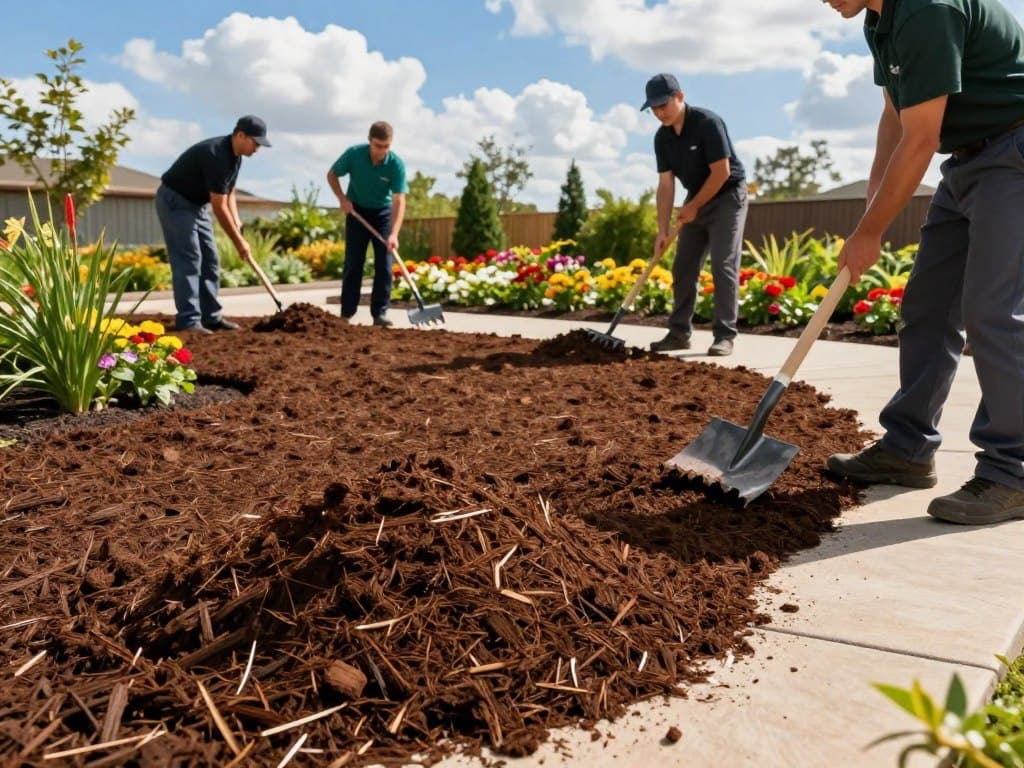
Spreading and distributing materials is a common need. Mulch, topsoil, or gravel can be spread evenly across garden beds and pathways. This ensures consistent coverage and a polished look.
Knowing these core functions allows any homeowner to select the right implement. Applying it correctly transforms any landscaping project. The right technique yields efficient, high-quality results every time.
Mistake #1: Raking in Random, Criss-Cross Directions

Creating a smooth ground surface begins with disciplined strokes, yet many opt for random patterns. This error is the first major hurdle to professional outcomes. People often drag their tool back and forth or in overlapping circles.
This chaotic motion disrupts the material being worked. It creates ridges and valleys across the area. The goal of a level finish becomes much harder to achieve.
An uneven finish causes problems for sod installation and seeding. Gravel compaction also suffers from an inconsistent base. This haphazard technique prevents the creation of a smooth, professional surface.
The Fix: Master the One-Direction Technique
The fundamental correction is adopting a unidirectional raking method. Pull the implement in straight, parallel lines across the work zone. This approach is crucial for gathering debris and establishing a uniform grade.
Start at one edge of the area. Pull the tool toward you in a smooth, even stroke. Then lift it and return to the starting point for the next pass.
Make each new pass slightly overlap the previous one. This systematic process collects material into manageable rows. It also gradually levels the ground for a more even surface.
Consistency is key whether using a handheld or tractor-mounted model. Maintaining a single direction for initial leveling passes yields uniform results. This method makes subsequent refinement steps much more effective.
For final smoothing, lighter strokes can be applied. The primary leveling action should always follow a consistent, unidirectional pattern. This disciplined technique transforms the entire landscaping process.
| Technique | Effect on Surface | Efficiency | Best For |
|---|---|---|---|
| Random Criss-Cross Raking | Creates ridges, valleys, and an uneven finish. | Low; causes rework and wasted effort. | Not recommended for any grading task. |
| One-Direction Technique | Produces a level, smooth surface ideal for further work. | High; systematically gathers debris and grades soil. | Initial leveling, debris collection, and establishing grade. |
The one-direction method is a core principle for using landscape tools correctly. It ensures material is moved predictably. Your project benefits from a stable and even base.
This technique applies to working with soil, sand, or gravel. The goal is always a uniform surface ready for the next step. Mastering this fix is the first step toward professional-level results.
Mistake #2: Using the Wrong Type or Size of Rake for the Job
Many property owners fail to realize that not all rakes are created equal for ground-leveling tasks. A common error is applying a small garden rake to a massive grading project.
Another misstep involves dragging an oversized tractor attachment through a delicate flower bed. This mismatch guarantees inefficiency and subpar results.
An undersized implement makes large projects exhausting. It turns a simple job into a time-consuming chore.
An oversized piece of equipment is cumbersome and difficult to control. It can overly disturb soil and damage existing plants.
The Fix: Match Your Tool to the Task and Terrain
The solution is a careful pre-project assessment. Consider the scale of your work, the terrain, and the material involved.
For small to medium residential projects, a sturdy handheld model is ideal. Tasks like preparing garden beds or spreading mulch are perfect for this equipment.
Leveling soil for a small lawn also falls into this category. A bow rake offers excellent control for these detailed jobs.
Large-scale work demands a tow-behind tractor attachment. Leveling a long gravel driveway is a prime example.
Clearing debris from a big field or grading land for a new pad are other major projects. Your tractor’s horsepower and property size guide the selection.
| Project Scale | Recommended Tool Type | Ideal Tasks | Key Considerations |
|---|---|---|---|
| Small/Medium (Residential) | Handheld Landscape Rake / Bow Rake | Garden bed prep, mulch spreading, small lawn leveling | Tine strength for soil type, comfortable handle length |
| Large/Commercial | Tractor-Tow Landscape Rake | Gravel driveway leveling, field clearing, land grading | Width matches tractor power, three-point hitch compatibility, durable tines |
Key selection factors include the rake’s width, tine strength, and attachment compatibility. Strong, closely spaced tines handle rocky soil better.
Wider, more flexible tines are excellent for loose mulch or topsoil. For versatile property maintenance, owning both types of landscape rakes is the ideal combination.
This gives you the right tools for every job, from detail work to major earth-moving projects.
Mistake #3: Skipping the Crucial Debris-Clearing Step
A perfectly graded surface can be ruined by what lies hidden beneath the topsoil. Many homeowners make the error of jumping straight into leveling or spreading material.
They bypass the essential task of removing large debris first. This includes stones, branches, construction rubble, and shallow roots.
This oversight creates several immediate risks. Hidden rocks and sticks can bend or break the tines of your landscape rake.
Debris can get tangled in the mechanism, causing damage. More critically, buried obstacles create hidden bumps under soil or gravel.
These bumps undermine your final surface, leading to an uneven lawn or garden bed. The quality of your entire project depends on a clean start.
The Fix: Always Perform a Preliminary Clean Sweep
Begin every project with a dedicated pass focused solely on clearance. Use your landscape rake with the tines set to a shallow depth.
Skim the surface to gather rocks, sticks, and roots into neat piles. This systematic approach efficiently combs the area.
For large properties, a tractor landscape rake excels at this task. It quickly rows debris across vast stretches of land for easy collection.
Always have a wheelbarrow or cart ready nearby. Transport the collected debris away from the work site immediately.
This prevents accidental reincorporation during later steps. Proper disposal is a key part of the process.
Clearing the area is especially vital for planting. Removing rocks and roots creates a cleaner seedbed.
It prevents obstacles that could hinder root growth for new grass or plants. It also protects gardening equipment from future damage.
This essential first step protects your tool investment. It lays the proper foundation for a high-quality leveling job.
Your subsequent work on the soil will be smoother and more effective. Never underestimate the power of a clean start.
Mistake #4: Raking Dry, Hard Soil or Overly Wet Ground
The quality of your final grade depends heavily on a factor many overlook: soil moisture. A common error is trying to work ground that is at an extreme.
This means soil baked hard by the sun or saturated from heavy rain. Both conditions create major obstacles for effective leveling.
Hard, compacted earth resists the tines of your landscape rake. They will skip and bounce across the top.
This action results in a choppy, uneven surface. It also puts excessive strain on your body and the tool itself.
Soggy ground presents the opposite problem. Wet soil clumps together and sticks to the metal tines.
It creates a muddy mess that clogs the equipment. Tractor wheels and the rake itself can sink in, causing soil compaction.
The Fix: Time Your Work for Ideal Soil Conditions
Plan your project for when moisture is in the ideal “goldilocks” zone. The earth should be slightly damp but not wet.
This makes the leveling process smoother and far more effective. It also protects the structure of the soil.
The best time to work is often a day or two after a light rain. For a dry area, lightly water it yourself the day before.
Allow the surface to drain properly. This pro tip reduces dust and makes soil easier to manipulate.
Test the ground before starting your project. Soil should crumble easily in your hand when it’s ready.
It must not stick together or leave water in your palm. Check moisture a few inches below the surface with a trowel.
The top layer can often be deceptive. Optimal conditions let the tool do its job with minimal effort.
| Soil Condition | Effect on Raking | Result on Surface | Risk to Equipment |
|---|---|---|---|
| Dry & Hard | Tines skip and bounce; high resistance. | Uneven, choppy finish; difficult to level. | Excessive strain on tines and handle; potential for damage. |
| Ideal (Moist) | Smooth, even strokes; soil moves predictably. | Level, smooth surface ready for seeding or sod. | Minimal strain; efficient operation. |
| Overly Wet & Soggy | Clumping and sticking; tines clog with mud. | Messy, compacted; ruts form from wheels and tool. | Clogging leads to cleanup issues; promotes rust. |
Working in the right conditions saves time and physical energy. Your landscape rake performs as intended on a prepared area.
Whether using a handheld model or a tractor attachment, this principle is key. It leads to a professional-grade surface every time.
Mistake #5: Applying Too Much Force and Raking Too Deeply
Attempting to move mountains in a single pass often leads to trenches, not a smooth grade. This final common error involves applying excessive muscle power to the landscape rake.
Homeowners lean heavily into the handle, forcing the tines deep into the earth. They believe this aggressive technique will move material faster and finish the job sooner.
The outcomes are consistently negative. This method gouges the soil, creating unsightly ruts and trenches. It prematurely bends or wears out the tines, leading to potential damage rake.
User fatigue sets in rapidly from the constant strain. The equipment suffers, and the finished surface is far from level.
The Fix: Let the Tool Do the Work with Light, Even Strokes
Adopt a technique that allows the weight and design of the implement to perform. Use controlled, light to moderate pressure instead of brute force.
Hold the handle firmly without a white-knuckle grip. Pull with a smooth, even motion that lets the tines glide through the top layer.
Depth control is critical for most leveling and spreading tasks. The tines should only penetrate an inch or two into the soil or gravel.
This shallow engagement moves material without disturbing the stable subsoil. It prevents the creation of deep grooves and uneven spots.
Multiple light passes are far more effective than one deep, forceful pull. Make several overlapping strokes to gradually achieve the desired grade.
Gentle use minimizes stress on the tines and the tool’s connections. This care extends the life of your rakes and prevents breakage.
For stubborn, compacted areas, employ a different tool first. Loosen the soil with a tiller or fork before using the landscape rake for the final, smooth finish.
How to Use a Landscaping Rake for Professional-Level Results
Professional landscapers achieve flawless results by following a systematic, multi-step process with their equipment. This method builds upon the foundational fixes for common errors. It details the precise adjustments and techniques that yield a superior finish.
Begin by confirming your preliminary work is complete. The area should be clear of debris and the soil moisture should be ideal. With those boxes checked, you can focus on the grading and smoothing process.
Adjusting Angle and Depth for Different Materials
The secret to controlling your tool lies in two simple adjustments. You must set the working angle and the tine penetration depth. These settings change based on the material you are moving.
A steeper, more aggressive angle is perfect for heavy tasks. Use this setting to move bulk gravel or cut into high spots. It allows the tines to dig in and pull material effectively.
For fine leveling and spreading topsoil, use a shallower angle. This setting lets the tines skim the surface. It distributes material evenly without digging trenches.
Depth control is equally important. For the main leveling pass, let the tines sink one to two inches. For the final smoothing pass, they should barely touch the surface.
| Material / Task | Recommended Angle | Recommended Depth | Primary Goal |
|---|---|---|---|
| Gravel / Aggressive Grading | Steep (Tines digging in) | 1-3 inches | Move bulk material, establish basic grade |
| Topsoil / General Leveling | Moderate to Shallow | 1-2 inches | Spread evenly, fill low spots |
| Final Smoothing | Very Shallow | Surface skimming only | Erase tracks and ridges for perfect finish |
The Final Pass: Refining for a Perfectly Smooth Surface
Execute the main leveling pass using the disciplined one-direction technique. Pull the tool in straight, parallel lines to establish your basic grade. Focus on moving bulk material from high areas into low spots.
Different materials require specialized approaches. For a gravel driveway, use a back-and-forth “window” motion after the initial pass. This redistributes stone without creating permanent windrows.
You can also use the flat backside of some rakes to tamp and settle the gravel. This creates a more stable and even surface for vehicle traffic.
Soil preparation for planting a lawn or garden needs a different touch. After the main leveling, use light, shallow strokes to break up any remaining clods. This creates a loose, fine tilth that promotes excellent seed-to-soil contact and root growth.
The final refinement pass is the most critical step for a professional look. Apply the lightest possible pressure to the handle. Let the tines just skim the surface to erase minor imperfections, tool tracks, and small ridges.
Always walk the area after you finish raking. Feel for any remaining bumps or dips with your feet. This tactile check ensures the surface is truly ready for sod, seed, or patio stones.
For large projects, work in manageable sections. Constantly check your progress from different angles to maintain consistency across the entire area. Step back and view your work from a distance to spot subtle slopes.
Mastering these adjustments and the multi-pass approach is what separates amateur results from professional-grade finishes. A smooth, level surface is the hallmark of a well-maintained landscape.
Protecting Your Investment: Simple Landscape Rake Maintenance
Rust and bent tines are the enemies of any grading tool, yet they are entirely preventable with a few simple habits. This equipment is a durable investment for your property. Basic care ensures it lasts for many years.
Reliable performance saves money on replacements. Consistent lawn maintenance also protects your financial outlay. A well-kept implement delivers better results every time.
Cleaning and Storage to Prevent Rust
Immediate post-use cleaning is the most critical step. Remove all caked-on soil, mud, and gravel from the tines. A stiff brush, putty knife, or garden hose works well.
Clearing plant material and leaves prevents organic decay. This debris can trap moisture against the metal. Thorough cleaning stops this process before it starts.
Drying the tool completely is non-negotiable. Any leftover moisture leads to rust formation. Rust weakens metal and makes tines brittle.
Wipe the frame and tines with a dry cloth. Let it air-dry in the sun if possible. Proper storage is the final defense.
Hang the rake or store it off the ground. A dry, covered location like a shed is ideal. Never leave it outdoors exposed to rain.
This routine takes only minutes after each project. It significantly extends the functional life of your equipment. Your landscape rake will remain ready for action.
| Maintenance Task | Handheld Rake | Tractor-Tow Rake | Frequency |
|---|---|---|---|
| Cleaning & Debris Removal | Brush off soil, rinse tines, remove rocks. | High-pressure rinse, clear mud from frame and hitch. | After every use |
| Drying | Wipe dry, air in sun. | Allow time for water to drain from joints. | After washing |
| Storage Location | Hang on wall hook in garage. | Park on level concrete in shed. | Always |
| Rust Prevention | Light oil coat on tines before winter. | Silicone spray on pivot points and metal surfaces. | Seasonally or before long storage |
Regular Tine Inspection and Care
Establish a routine for checking your tool’s condition. Look for signs of bending, cracking, or excessive wear. Pay close attention to where the tines connect to the bar.
Minor issues are easy to fix if caught early. Straighten a slightly bent tine carefully with a vise and hammer. This preserves the tool’s balance and effectiveness.
Tighten any loose bolts or nuts on the handle. Check the hitch assembly on tow-behind models. Secure connections are vital for safety and performance.
For tractor-mounted rakes, lubricate pivot points periodically. The hitch mechanism also needs oil to prevent seizing. Smooth operation depends on this simple care.
Apply a light coat of oil or silicone spray on clean, dry tines. Do this before long-term storage for extra protection. It creates a barrier against humidity.
These habits maintain the tool’s effectiveness season after season. They protect your investment and ensure reliable results. Your landscape will benefit from a well-maintained implement.
Choosing the Right Landscape Rake: Handheld vs. Tractor Attachment
Effective land management hinges on matching the right equipment to the scale of your project. The two primary types of landscape rakes serve distinct purposes. A handheld model offers precision for residential tasks.
A tow-behind tractor attachment provides power for large-scale land work. Selecting the correct tool saves time and effort. It also ensures professional results for your property.
Consider the size of your area and the materials involved. Soil, gravel, and mulch each demand specific tool features. Your choice impacts the entire project’s outcome.
This decision is one of the most important for property care. The right implement makes work easier and faster. It also protects your investment in outdoor equipment.
Selecting a Rake for Small to Medium Residential Projects
For most homeowners, a high-quality handheld landscape rake is the perfect choice. These tools are affordable and easy to store in a garage or shed. They excel at detailed work around gardens and lawns.
Common tasks include preparing garden beds for planting. Spreading mulch around shrubs and trees is another ideal job. Leveling small lawn areas after seeding is also well-suited.
Look for a sturdy steel head that resists bending. The handle should have a comfortable, non-slip grip. Tines must be strong yet slightly flexible to absorb impact.
This flexibility prevents damage when hitting hidden rocks. It also allows the tool to glide over uneven ground. A bow rake design often provides excellent control.
These rakes are perfect for working with soil, compost, and light gravel. They allow you to feel the surface and make fine adjustments. Your hand guides the tool for precise results.
When to Consider a Tow-Behind Tractor Rake
Tractor-mounted rakes are essential power tools for larger parcels of land. Anyone with a tractor, riding mower, or ATV should consider this attachment. It transforms your machine into a grading powerhouse.
Several scenarios necessitate a tow-behind model. Leveling and maintaining long gravel driveways is a primary example. Clearing acres of field debris like rocks and roots is another.
Grading soil for building pads or foundations requires this equipment. Preparing large seedbeds for farming or new lawns is efficient. Dethatching expansive grassy areas becomes a quick job.
Key selection criteria include width, build quality, and hitch compatibility. Width must match your tractor’s horsepower. Compact tractors typically handle rakes five to six feet wide.
Utility tractors can manage seven to eight feet or more. Heavy-duty steel construction ensures durability. A Category 1 three-point hitch is the standard connection.
Advanced features add versatility and value. Adjustable tine angles allow for different materials. Gauge wheels provide precise depth control during operation.
Reversible tines extend wear by offering a fresh edge. These options make the tool adaptable to various projects. They represent a smart investment for serious land care.
| Project Scale | Recommended Tool | Ideal Tasks | Key Features |
|---|---|---|---|
| Small/Medium Residential | Handheld Landscape Rake | Garden bed prep, mulch spreading, small lawn leveling | Sturdy steel head, comfortable grip, flexible tines |
| Large/Commercial | Tractor-Tow Landscape Rake | Gravel driveway maintenance, field clearing, land grading | Width matches tractor HP, heavy-duty build, 3-point hitch |
Homeowners with both small gardens and large open areas have options. Owning a handheld rake for detail work is practical. Renting or investing in a tractor rake for occasional big jobs can be cost-effective.
This strategy ensures you have the right tool for every task. It maximizes efficiency across all your property management projects. Your landscape benefits from professional-grade results.
The correct equipment choice directly impacts safety and ease of use. It also influences the longevity of your tools. Proper care begins with selecting the appropriate type.
Your land deserves the best approach for its unique needs. Whether moving soil, gravel, or clearing leaves, match the tool to the job. This principle leads to a beautiful, well-maintained outdoor space.
Conclusion
The difference between a mediocre yard and a magnificent one often lies in the correct application of a single, versatile implement. Avoiding the five common errors—random patterns, wrong tool choice, skipping debris clearance, poor soil timing, and excessive force—is fundamental to success.
This landscape rake transforms messy, uneven ground into a smooth, workable surface. Apply the fixes: adopt the one-direction technique, match the rake to the job, clear debris first, work in ideal moisture, and use light strokes.
Proper technique combined with simple maintenance protects your tool. It delivers professional-level results for years. Investing time in learning correct methods pays dividends in saved effort and superior project outcomes.
Your property gains enhanced curb appeal. With this knowledge, tackle landscaping projects with confidence and efficiency. Achieve the satisfaction of a job well done.