

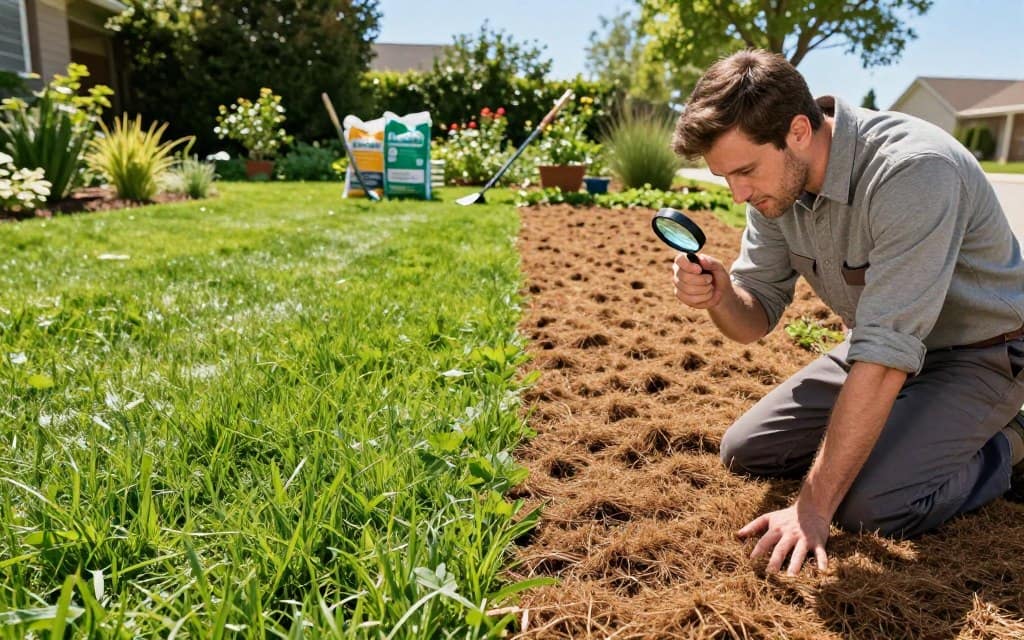
A paver patio adds massive curb value, but this only happens if it stays perfectly level for years. Many DIY attempts fail because they don’t follow proper techniques for how to install pavers, treating the work as simply laying stones.
True professional results come from building a multi-layer system. This system manages water and supports weight. The core of a lasting patio is not the surface you see.
It is the hidden base preparation and drainage layers underneath. Ignoring these steps leads to sinking, shifting, and ugly water pooling.
This complete guide walks you through the entire process. We cover planning, excavation, base layers, and the final laying techniques. Our goal is a durable, long-lasting outdoor living space.
You can choose from concrete, clay brick, or natural stone pavers. Each material works with the same fundamental hardscape installation principles. Investing time in the correct process now prevents costly repairs later.
Key Takeaways
- Professional paver installation is about constructing a multi-layer system for drainage and support.
- Proper base preparation is the most critical step to prevent sinking and movement.
- This guide provides a comprehensive, step-by-step process for a DIY enthusiast.
- A successful project enhances your outdoor living area and property value.
- Different paver materials, like concrete or stone, all require the same core installation method.
- Following the correct guide ensures a level, durable patio that lasts for decades.
- Planning and preparation are the keys to a professional-grade result.
Introduction: Why Proper Paver Installation Matters

Many homeowners dream of a beautiful patio but overlook the critical foundation work required for longevity. Proper paver installation is the bedrock of a stable and durable outdoor surface. It moves far beyond simply arranging stones on the ground.
Common failures include sinking pavers, frost heaving, and persistent weed growth. These issues stem from inadequate preparation of the base layers. Water damage from poor drainage accelerates these problems.
The core principle of a professional-grade result is a multi-layer drainage system. This engineered approach manages subsurface water and distributes weight evenly. It is the hidden secret behind a patio that lasts for decades.
A typical DIY shortcut involves placing pavers directly on sand. The professional method uses a gravel base topped with a sand bedding layer. This difference defines success or failure for your entire project.
| Aspect | Common DIY Shortcuts | Professional-Grade Method |
|---|---|---|
| Approach | Laying stones on sand or soil | Building a multi-layer support system |
| Base Preparation | Minimal or no excavation | Precise excavation and soil compaction |
| Drainage | Relies on surface slope alone | Integrated gravel base for subsurface drainage |
| Long-Term Outcome | Shifting, settling, and frequent repairs | A stable, level surface lasting many years |
The long-term benefits are significant. A correctly installed paver patio boosts your home’s curb appeal and property value. It also requires minimal maintenance over time.
Investing time and effort in the correct techniques saves money. You avoid costly repairs and premature replacements. Proper installation also ensures safety by eliminating tripping hazards from uneven stones.
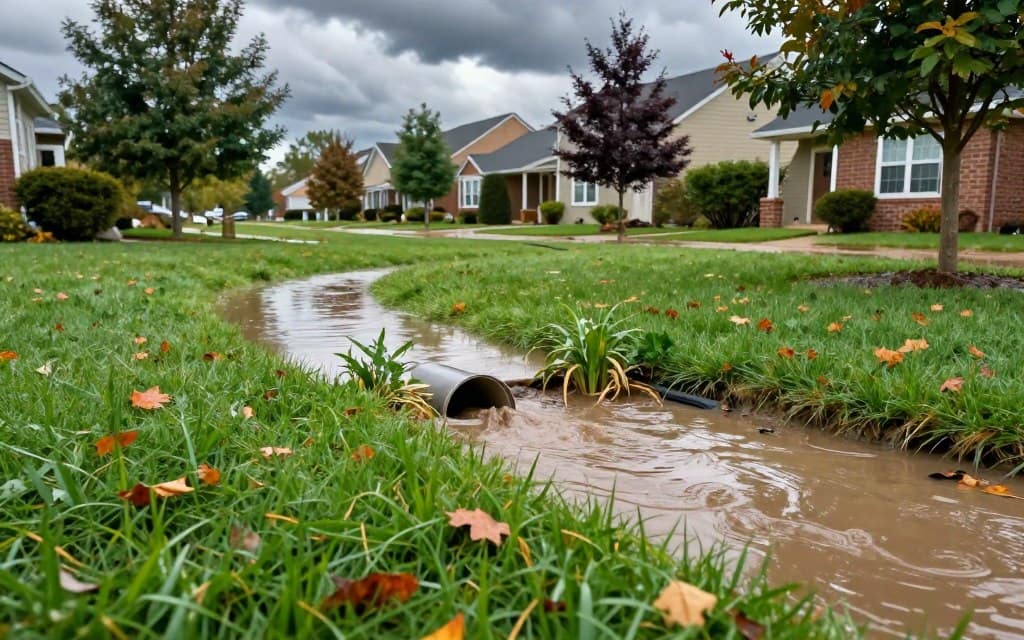
A well-drained patio prevents water from pooling on the surface. This protects your home’s foundation and surrounding landscaping. Effective water management is a non-negotiable part of the process.
Each phase of the installation, from planning to compaction, is critical. The following sections detail these steps. Mastering this process ensures your outdoor living space remains beautiful and functional for years.
Moving Beyond Laying Stones: The Multi-Layer Drainage System Explained

A multi-layer drainage system is the unsung hero that prevents common patio failures like sinking and water pooling. This approach treats the ground as an engineered structure. It manages subsurface moisture and distributes weight far better than soil alone.
Each layer in this system has a distinct, critical job. They work together to create a stable and dry foundation for your outdoor space. Ignoring any single component compromises the entire project’s longevity.
The Role of the Gravel Base in Drainage
The gravel base is the workhorse of the drainage system. It consists of angular, crushed stone like limestone or granite. This material provides crucial structural support for the layers above.
Its primary function is to allow water to percolate down and away from the sand and pavers. This action prevents frost heave in cold climates. It also stops the saturated ground from softening and causing settlement.
For a standard patio, this base layer should be four to six inches thick after compaction. Driveways or areas with vehicle traffic require a thicker base, often up to twelve inches. Always place a permeable landscape fabric beneath the gravel.
This fabric suppresses weed growth while still allowing water to drain through. Proper compaction of this gravel layer is non-negotiable for a solid foundation.
How the Sand Bedding Layer Supports Stability
Directly atop the compacted gravel sits the sand bedding layer. This is not the same as play sand or topsoil. Use coarse, concrete sand or stone dust for the best results.
The sand layer is typically one to one and a half inches deep. It creates a perfectly level and forgiving surface for placing each stone. You can make minor adjustments here to achieve a flat, even finish.
This layer does not contribute to drainage like the gravel below. Its job is to offer a stable, uniform bed. It ensures each paver makes full contact with the support system, eliminating voids.
Why Slope is Critical for Water Runoff
Effective slope is what directs water off your patio surface. Without it, water pools, causing stains, ice hazards, and damage. The goal is to channel runoff away from your house and other structures.
A minimum slope of one-eighth inch per linear foot is standard. This gentle grade is almost invisible to the eye but highly effective. For a ten-foot patio, the far end should be about one and a quarter inches lower than the end near your house.
You can check this slope during base preparation. Use string lines attached to stakes and a line level. Establish your high point and low point, then compact your gravel and sand to follow this consistent gradient.
| System Layer | Primary Function | Key Specification |
|---|---|---|
| Compacted Soil Sub-base | Provides a firm, stable starting layer for the entire system. | Soil must be excavated to proper depth and thoroughly compacted. |
| Gravel Base | Offers structural support and primary subsurface drainage. | 4-6 inches thick for patios; made of crushed, angular stone. |
| Sand Bedding Layer | Creates a level, adjustable surface for paver placement. | 1-1.5 inches of coarse sand, screeded to a smooth finish. |
| Pavers & Joint Sand | Forms the visible, durable surface and locks units together. | Joint sand fills gaps and stabilizes the final layer after compaction. |
This multi-layer system stands in direct contrast to placing pavers on topsoil. A proper base preparation combats hydrostatic pressure and soil erosion. Each element works in concert to deliver a patio that remains level and attractive for decades.
The right drainage extends your project’s lifespan dramatically. It reduces maintenance and protects your home’s foundation. Investing in these hidden layers is the definitive step for a professional-grade result.
Essential Tools and Materials for Your DIY Paver Project

Your project’s quality hinges on having the right equipment and supplies before the first shovel hits the ground. Proper preparation with the correct tools and materials separates a professional-grade DIY patio from a problematic one.
Attempting this work with inadequate gear leads to poor compaction, uneven surfaces, and frustration. This list organizes everything you need by project phase.
| Essential Tool | Primary Project Phase | Key Purpose |
|---|---|---|
| Measuring Tape, Stakes & String Line | Planning & Layout | Establishes precise boundaries, elevation points, and drainage slope. |
| Shovel (Spade & Flat) | Excavation | Removes soil and shapes the excavated area to the required depth. |
| Rake (Metal & Landscape) | Base Preparation | Spreads gravel and sand evenly for a uniform layer. |
| Plate Compactor | Base Prep & Finishing | Vital for compacting soil, gravel base, and setting pavers. A hand tamper is insufficient. |
| Level (4-ft. & Line) | Base & Paver Laying | Ensures the sand bed and each stone are perfectly flat and on-grade. |
| Rubber Mallet | Paver Laying | Taps stones into the sand bed for final leveling and alignment. |
| Broom & Garden Hose | Finishing | Sweeps joint sand into gaps and activates polymeric sand with a light mist. |
A plate compactor is the most critical tool rental. It provides the force needed to lock the gravel and sand layers into a solid, stable base. It also vibrates the final surface to settle the joint sand.
High-quality materials are just as important as the tools. Using the right type and grade ensures longevity and performance.
| Material | Specification | Purpose & Note |
|---|---|---|
| Pavers | Concrete, brick, or natural stone. | Choose based on style, budget, and traffic. Buy 10% extra for cuts and waste. |
| Gravel Base | Crushed stone (e.g., limestone, granite). | Provides drainage and support. Angular stone locks together when compacted. |
| Coarse Sand | Concrete sand or stone dust. | Forms the one-inch bedding layer for leveling and adjusting pavers. |
| Edge Restraints | Plastic or metal spikes. | Secures the outer perimeter of the patio to prevent spreading. |
| Joint Sand | Polymeric sand is recommended. | Fills gaps between pavers. It hardens when wet, resisting weeds and insects. |
| Landscape Fabric | Optional, but recommended. | Placed under the gravel base to suppress weed growth while allowing drainage. |
Polymeric sand is a smart upgrade for joint material. It creates a more durable, low-maintenance surface compared to regular mason sand.
Calculate your material quantities carefully. For gravel and sand, determine your project’s square footage and desired depth in inches. Use an online volume calculator or consult your supplier.
Renting a plate compactor and a masonry saw for cutting is cost-effective. It provides professional power without a large purchase.
Organize your delivery pile. Keep gravel, sand, and pavers on separate tarps near the work area. This streamlines the process and keeps your site tidy.
Having all tools and materials ready before starting prevents costly delays. It allows you to maintain a steady workflow for a superior final result.
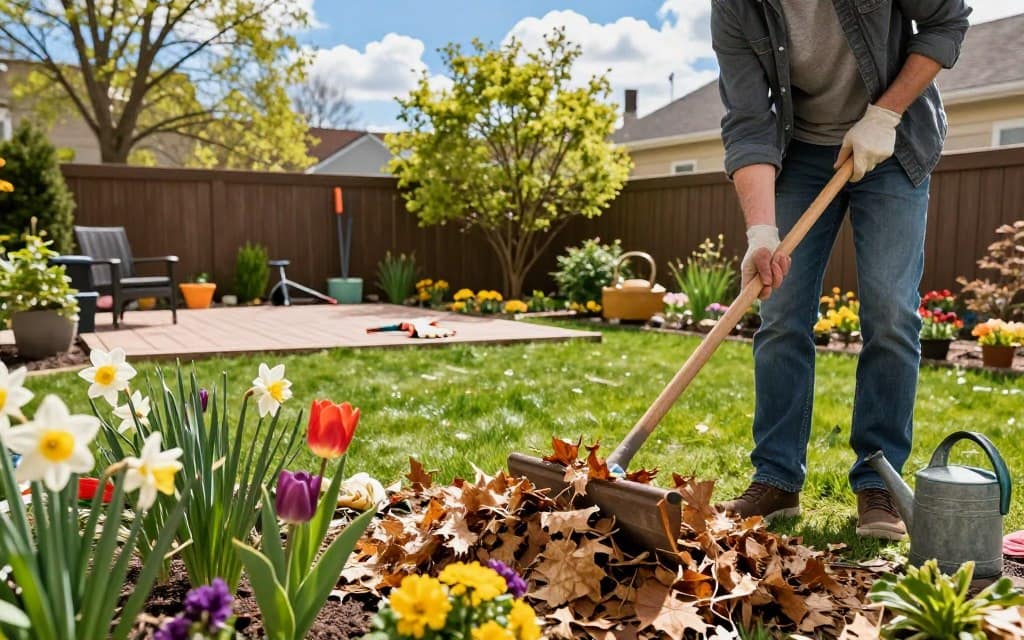
Planning Your Patio: Design, Layout, and Drainage Considerations
The design and layout phase is your project’s blueprint. Aesthetic vision meets practical engineering for drainage and stability here.
Thorough planning prevents costly mistakes. It ensures your outdoor space meets both functional and aesthetic goals from day one.
Choosing the Right Pavers for Your Needs
Your choice of material sets the tone for the entire area. Consider budget, desired look, and maintenance before selecting.
Concrete pavers offer vast style and color options at a moderate cost. Clay brick delivers a classic, timeless appearance with high durability.
Natural stone provides a unique, upscale look. Each piece varies in color and texture, creating a one-of-a-kind surface.
The laying pattern also impacts the final design. A herringbone pattern is very stable for driveways. A running bond pattern is simpler and works well for patios.
| Paver Type | Key Attributes | Best For | Maintenance Level |
|---|---|---|---|
| Concrete | Cost-effective, wide color/pattern variety, uniform sizing. | DIY projects, modern designs, high-traffic areas. | Low; may require occasional sealing. |
| Clay Brick | Classic aesthetic, excellent durability, natural color. | Traditional styles, historic homes, walkways. | Very low; highly fade-resistant. |
| Natural Stone | Upscale, unique appearance, irregular shapes and sizes. | High-end landscapes, rustic or elegant focal points. | Moderate; may require sealing for stain resistance. |
Calculating Slope for Effective Drainage
Proper slope is non-negotiable for moving water off your patio. Plan for a grade of 1/8 to 1/4 inch per linear foot away from your house.
Use stakes, string, and a line level to establish this grade. Drive a stake at your planned high point, near the house.
Drive a second stake at the far end of the project area. Attach a taut string between them. Use the line level to adjust the string to your calculated slope.
For a ten-foot run, the low end should be 1.25 to 2.5 inches lower. This string line becomes your guide for all subsequent base work.
Marking the Area and Checking for Utilities
Outline your planned patio shape on the ground. Use white marking paint or a garden hose for curves.
Use the 3-4-5 triangle method to ensure corners are square. This step is crucial for a professional look and accurate material estimates.
Before any digging, you must call 811. This free service locates underground utilities like gas lines, pipes, and electrical cables.
Utility companies will mark their lines with colored paint or flags. This protects you from danger and costly repair bills.
Calculate your total excavation depth. Add the thickness of your gravel base, sand layer, and the pavers themselves.
For example, a 6-inch base, 1-inch sand bed, and 2-inch thick stone equals a 9-inch dig depth. Always excavate a few inches wider than your final patio for edge restraints.
Plan for curves and irregular shapes. These designs require more cutting of individual units. Factor this into your material order.
Consider adjacent structures, trees, and existing drainage. Your new patio should complement, not disrupt, your landscape’s water flow.
Create a scaled drawing on graph paper. This visual plan helps finalize the layout and provides a reliable checklist for your material list.
Solid planning is the foundation of a successful DIY patio. It turns ideas into a durable, beautiful, and functional outdoor living space.
Step 1: Excavating the Site to the Correct Depth
Precise digging establishes the literal foundation upon which every other layer of your patio will rest. This first physical step in base preparation is non-negotiable for a stable, long-lasting surface.
An accurate excavation creates the space needed for your gravel, sand, and stones. Mistakes here lead to an unstable foundation and future problems.
Your first task is calculating the total dig depth. Add the thickness of all materials that will sit below the finished surface.
This includes your compacted gravel base, sand bedding layer, and the pavers themselves. Use this simple formula.
| Layer | Typical Thickness | Primary Function | Calculation Note |
|---|---|---|---|
| Compacted Gravel Base | 4 to 6 inches | Drainage and structural support. | Use 6 inches for heavier use or poor soil. |
| Sand Bedding Layer | 1 to 1.5 inches | Provides a level bed for placement. | Measure after screeding, not loose. |
| Paver Thickness | Varies (e.g., 2.25 inches) | The final walking surface. | Check your specific product. |
| Total Excavation Depth | 7.25 to 9.75 inches (example) | Space for the entire system. | Always measure from your finished grade line. |
Mark your project area clearly with stakes and string. Your strings should already be set to the final patio height and slope.
Begin digging from the high point of your slope. Use a flat shovel for slicing sod and a spade for deeper soil removal.
For large areas, consider renting a small excavator or a sod cutter. This saves immense time and labor.
Remove all organic material from the excavation. Grass, roots, and debris will decompose over time.
This decomposition creates voids under your base, causing settling and an uneven surface. A clean sub-grade is essential.
Once you reach the rough depth, compact the exposed soil sub-base. Use a plate compactor for this critical task.
Run the machine over the entire excavated area in overlapping passes. A firm, compacted sub-grade prevents the gravel from sinking into soft earth.
Check your depth frequently during digging. Use a measuring tape from your slope strings down to the ground.
Measure at multiple points across the site. Consistency is key for a uniform base layer thickness later.
Excavate an extra 6 to 12 inches beyond your final patio perimeter. This extra space is for installing plastic or metal edge restraints.
These restraints lock the outer stones in place, preventing the entire surface from spreading outward over time.
Plan for the removed soil. You can use it to fill low spots in your yard, create berms, or order a dumpster for disposal.
Avoid over-excavating. Digging too deep forces you to backfill with gravel, which is costly and less stable than the native soil.
If you accidentally go too deep, compact a layer of crushed stone to bring the grade back up. Re-compact thoroughly.
Always prioritize safety during this phase. Wear sturdy gloves, safety glasses, and steel-toe boots if using machinery.
Use proper lifting techniques for heavy loads of soil. Bend at the knees, not the waist.
Accurate excavation sets the stage for all subsequent work. A level, properly sloped, and clean hole is the first victory in your project.
This careful base preparation ensures your gravel and sand layers perform as designed. It is the unseen key to a patio that stays level for decades.
Step 2: Compacting the Soil and Installing Edge Restraints
A firm sub-base and rigid edges create the ‘box’ that holds your entire patio system. This step focuses on two sequential actions. First, you solidify the ground. Then, you establish a permanent perimeter.
Both tasks are part of the essential multi-layer support structure. They work together to provide vertical and lateral stability for the surface above.
Begin with the soil compaction process. The exposed earth in your excavated area must be densely packed. Use a rented plate compactor for this job.
Make multiple, overlapping passes across the entire project site. This action eliminates air pockets and creates a solid, unyielding sub-base. A well-compacted soil layer prevents future settling of the gravel and stones.
Next, address the perimeter with edge restraints. These are continuous borders installed around the excavated area. Their primary purpose is to prevent the finished surface from spreading or shifting outward over time.
Without these restraints, the outer stones can creep into the surrounding lawn. This movement ruins the level appearance and compromises structural integrity.
Place the restraint material along the inner wall of your excavation. Plastic, metal, and concrete are common choices. Secure them using long, 12-inch galvanized spikes driven through pre-formed holes.
Ensure the top of the restraint aligns with the intended finished height of your patio. It should sit just below the top of the stones. This placement keeps the border hidden for a clean look.
For curved designs, you may need to cut the restraint material. Use a fine-tooth saw for plastic or a hacksaw for metal. Follow the curve smoothly to maintain a continuous barrier.
It is critical to complete this step before adding any base gravel or sand. Installing the restraints first locks them firmly against the compacted ground. This provides a fixed boundary for all subsequent layers.
Check alignment and level along the entire perimeter as you work. A taut string line set to your final grade is an excellent guide. Adjust the spikes to hold the restraint perfectly in place.
| Restraint Type | Key Advantages | Considerations |
|---|---|---|
| Plastic | Flexible for curves, easy to cut, cost-effective, and resistant to rust. | May have lower sheer strength than metal in high-stress applications. |
| Metal (Aluminum/Steel) | Superior strength and rigidity, very long-lasting, minimal flex. | More expensive, requires cutting tools for metal, can corrode if not coated. |
| Concrete | Extremely durable and permanent, often used for curbs in driveways. | Heavy, requires mixing and forming, less common for standard patio projects. |
After the restraints are spiked in, backfill behind them with soil or compacted gravel. This backfilling adds crucial lateral support. It prevents the outer border from being pushed outward by the weight of the internal base materials.
This step effectively locks in the project boundaries. It provides the lateral stability the entire system needs to remain intact for decades. A compacted sub-grade and a secured edge are the unsung heroes of a professional-grade patio base.
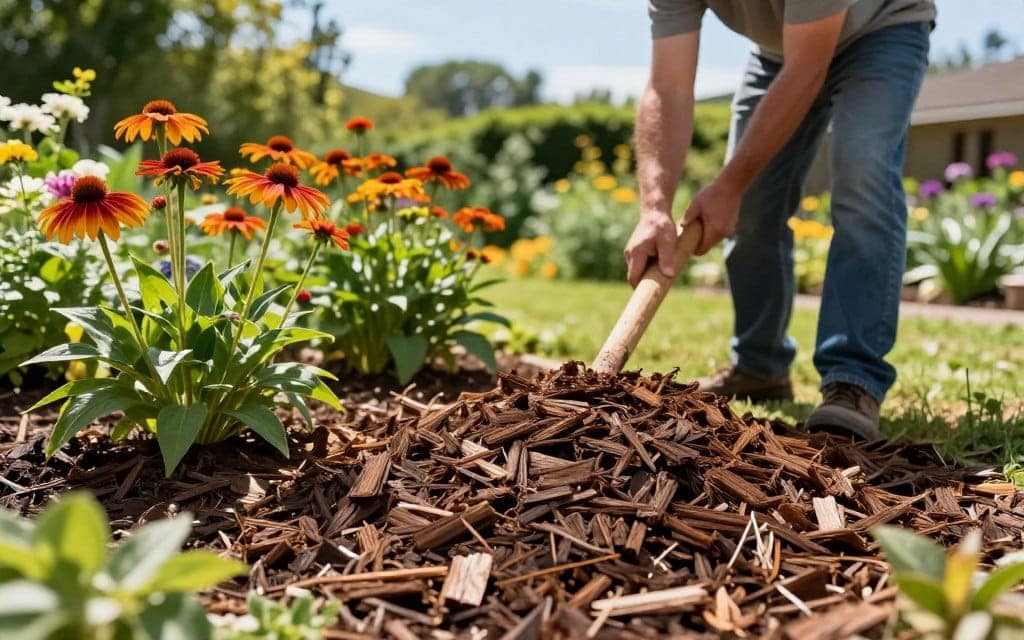
Step 3: Building the Gravel Base for Optimal Drainage
Building a robust gravel base is the single most important action for preventing future settling and movement. This layer transforms your excavated site into a load-bearing platform.
It manages subsurface water and distributes weight evenly. The process involves placing and compacting crushed stone in specific stages.
Laying and Compacting the Crushed Stone Layer
Your gravel base material must be coarse and angular. Crushed limestone or granite works perfectly.
These stones have sharp edges that interlock when compacted. Avoid rounded materials like pea gravel or river rock.
Begin by spreading the first two to three-inch layer across the entire site. Use a metal rake to create an even distribution.
Now, compact this material with a plate compactor. Make several overlapping passes across the entire area.
Proper compaction eliminates air pockets. It creates a dense, solid foundation that will not shift later.
Add the next two to three-inch lift of stone and repeat the compaction process. Continue until you reach your total desired depth.
Lightly misting the stone with water before compaction can help. It reduces dust and improves particle binding.
Consider placing a geotextile fabric on the compacted soil before adding gravel. This fabric separates the stone from the soil below.
It prevents the two materials from mixing over time. This step further stabilizes the entire base.
Ensuring Proper Thickness and Slope
Maintain the planned slope throughout the entire gravel base installation. Your string lines are the guide for this.
Check the depth of your material frequently. Use a ruler or measuring stick from the string line down to the stone surface.
A standard patio requires a compacted gravel base four to six inches thick. For heavier loads, increase this to eight or twelve inches.
The final surface of this layer must be level and follow your slope precisely. Any high or low spots will transfer to the sand and pavers above.
Extend the gravel base slightly beyond the installed edge restraints. This provides added lateral support for the entire system.
A well-built gravel base performs two vital functions. It bears the structural load of everything above it.
It also provides a channel for water to drain away from the surface. This dual action is the core of a stable, long-lasting patio.
| Specification | Detail | Purpose & Note |
|---|---|---|
| Primary Material | Angular, crushed stone (e.g., limestone) | Provides interlocking strength and superior drainage versus rounded stone. |
| Total Compacted Thickness | 4 to 6 inches (standard patio) | Must be consistent across the entire project area for even support. |
| Installation Method | 2-3 inch layers (lifts), each compacted | Allows for thorough compaction, eliminating voids and creating density. |
| Critical Tool | Plate Compactor | Essential for achieving proper compaction; a hand tamper is insufficient. |
| Slope Integration | Follows the established string line grade | Ensures the base itself contributes to positive water runoff from the start. |
This foundation layer is the hidden key to your project’s success. Investing time here guarantees a surface that stays level and attractive for years.
A solid gravel base stops sinking before it can even start. It is the definitive step in professional-grade base preparation.
Step 4: Adding and Leveling the Sand Bedding Layer
This one-inch layer of coarse sand acts as the critical interface between the solid base and the individual stones. It is the final hidden step before your patio’s visible surface takes shape.
The sand bedding layer provides a smooth, adjustable surface for placement. It allows for minor adjustments to achieve a perfectly flat finish.
Spread about one inch of coarse concrete sand over the compacted gravel base. Do not use fine play sand or topsoil.
Coarse, sharp sand compacts well and resists washing away. This material is a key part of the multi-layer system.
Use screed pipes or straight boards as guides to ensure uniform depth. Place them parallel on the gravel, set to your exact one-inch height.
Drag a straight two-by-four board across the guides. This action levels the sand to a consistent depth across the entire area.
| Sand Type | Best Use | Key Characteristic |
|---|---|---|
| Coarse Concrete Sand | Ideal for paver bedding | Sharp grains lock together; provides stable, non-shifting surface. |
| Stone Dust (Screenings) | Alternative bedding material | Very fine, compacts to a hard surface; less common in some regions. |
| Mason Sand | Not recommended for bedding | Too fine; can wash out easily and lead to settling over time. |
The sand layer must follow the same slope as your gravel base. This ensures consistent drainage from the surface down.
Do not walk on or disturb the leveled sand bed once it is prepared. Footprints create low spots that transfer to the stone surface.
If you find a low area after screeding, add a small amount of sand. Re-screed that section to blend it perfectly with the surrounding surface.
Avoid making this layer too thick. Excess depth can lead to future settling as the sand compresses under weight.
Use a trowel to “cut in” sand along the edges and around obstacles. This technique ensures full coverage right up to your restraints.
A perfectly leveled sand bed is the key to a flat, even surface with uniform joints. It is the crucial final preparation before laying begins.
How to Install Pavers: The Step-by-Step Laying Process
The moment of truth arrives when you begin placing each stone onto the prepared sand bed. This phase moves beyond simple stacking to precise, methodical construction. Your careful work here defines the final appearance and longevity of your outdoor surface.
Follow these instructions to ensure a professional-grade result. Each action builds upon the solid foundation you have already created.
Starting from a Corner and Maintaining Patterns
Begin your project at a fixed 90-degree corner. Align the first paver against a straight edge, like a house foundation or restraint. Work outward along this longest straight line to establish a true guide for the entire area.
Dry-fitting a few rows before final placement is a smart step. This practice confirms your chosen pattern, whether herringbone or running bond. It also helps visualize the layout and identify any potential issues early.
Place each unit directly down onto the sand bed. Avoid sliding stones, as this disturbs the level surface beneath. Gently butt each new paver against its neighbors without forcing it.
Work from multiple pallets if your material has color variations. Blending stones from different boxes creates a more natural, uniform look across the finished surface.
Always work from the already laid pavers, not the sand bed. Kneel on a wide board to distribute your weight if you need to reach forward. This protects the leveled sand from footprints and depressions.
Using a Rubber Mallet for Leveling and Alignment
A rubber mallet is your primary tool for fine-tuning during the laying pavers process. Use light, firm taps to seat each stone firmly into the sand bedding layer. Check for level frequently with a long, straight board or a four-foot level.
If a paver sits too high, tap it down gently until it aligns with surrounding units. If it is too low, lift it and add a small amount of sand beneath before reseating. This attention to detail ensures a flat, safe walking surface.
Maintain straight lines and proper alignment by stretching string lines across the field. Use these guides as visual references for each new row. Adjustments are easy to make at this stage but become difficult later.
| Tool | Role in Laying Process | Pro Tip |
|---|---|---|
| Rubber Mallet | Seats pavers and adjusts for level without damaging the surface. | Use a consistent, moderate force; avoid aggressive pounding. |
| 4-ft. Level | Verifies flatness across multiple stones and identifies high/low spots. | Check both along and across the joints for comprehensive accuracy. |
| String Lines | Provides a straight edge reference for maintaining alignment and pattern. | Re-set lines every few rows to account for minor cumulative drift. |
Keeping Consistent Gaps for Joint Sand
Uniform gaps between each stone are essential for the next step. Aim for consistent joints approximately one-eighth of an inch wide. These spaces will later be filled with sand to lock the entire surface together.
You can maintain these gaps by eye for experienced DIYers. Plastic spacers are also available to ensure precision. The key is consistency across the entire project area.
Focus on laying full pavers in the main field first. Save cutting for the edges and curves until the central area is complete. This approach maximizes efficiency and minimizes waste.
Periodically step back and view your work from a distance. Look for any deviations in the pattern or alignment. Correcting minor issues now prevents noticeable flaws in the final patio.
Careful, methodical placement ensures both professional appearance and structural integrity. This disciplined approach is what separates a lasting installation from a temporary fix.
Step 5: Cutting Pavers for Edges and Curves
Achieving crisp, clean edges and smooth curves transforms your patio from a basic layout into a polished, custom design. This step involves trimming individual units to fit the perimeter and any obstacles.
Cutting is necessary where full stones cannot complete the pattern. This includes borders, around posts, or along garden beds.
Curved boundaries also require precise shaping. Proper cuts ensure a tight fit and maintain the structural integrity of the surface.
Selecting the correct tool makes the job efficient and safe. Your choice depends on the paver material and the number of cuts required.
| Tool | Best For | Key Features & Notes |
|---|---|---|
| Masonry Wet Saw | Precise cuts on all paver types (concrete, brick, stone). Ideal for complex shapes and many cuts. | Uses water to reduce dust; provides clean, straight, or angled cuts. Rent one for larger projects. |
| Guillotine Splitter | Quick, straight cuts on concrete pavers only. Best for simple projects with fewer cuts. | Manual tool; creates a clean break along a scored line. No power needed, but limited to straight lines. |
| Angle Grinder with Diamond Blade | On-site trimming, curved cuts, or when other tools are unavailable. | Generates significant dust; requires strict safety gear. Good for minor adjustments and tough materials. |
Follow these instructions for accurate results. First, measure the gap where the cut piece must fit.
Transfer this measurement to the paver and mark the cut line clearly with a chalk or pencil. Double-check your marks before proceeding.
Secure the stone firmly on a stable surface. Use clamps if available. Always wear full safety gear during this part of the project.
Essential protection includes safety goggles, heavy-duty gloves, and ear protection. A dust mask is crucial when using a saw or grinder.
For curved boundaries, make a series of straight cuts to approximate the curve. Nibble away small sections until the shape matches your layout.
Place cut edges facing inward whenever possible. Use full, uncut pavers on the most visible edges for a cleaner appearance.
Renting a wet saw is cost-effective if your project demands numerous cuts. Many home improvement stores offer daily rentals.
Handle cut pieces with care. They can be more fragile than whole stones. Use them in less trafficked areas of your patio.
Fill irregular gaps with smaller cut pieces. Ensure they are tightly fitted to prevent movement. This maintains the locked pattern across the entire surface.
Clean, accurate cutting gives the installation a finished, professional look. It seamlessly integrates the new surface with your existing landscape.
Step 6: Filling Joints and Final Compaction
With all stones laid, your focus shifts to the spaces between them. This final stage solidifies your entire project into a single, durable surface.
Filling joints and compacting the area is the definitive last act. It locks every unit together and seals the patio against weeds and water.
This process is the capstone of your multi-layer system. It ensures the surface remains monolithic and level for many years.
Sweeping in Polymeric Sand for Durability
Polymeric sand is the recommended material for filling joints. This special mix contains fine sand and binding polymers.
Its purpose is threefold. It mechanically locks stones together, prevents weed growth, and inhibits insect intrusion.
Begin by spreading the dry polymeric sand across the entire surface. Use a push broom to sweep the material into all the gaps.
Move the broom in multiple directions to ensure complete filling. The goal is to have the sand slightly overfill each joint.
| Feature | Polymeric Sand | Regular Mason Sand |
|---|---|---|
| Binding Action | Hardens into a semi-rigid filler when activated with water. | Remains loose and can wash out or be displaced over time. |
| Weed & Insect Resistance | Excellent; creates a solid barrier that blocks growth and nests. | Poor; organic material can settle in the joints and sprout. |
| Long-Term Stability | Superior; resists erosion from rain and wind, maintaining joint integrity. | Low; requires frequent re-sanding as material is lost. |
| Maintenance | Very low after initial curing. May last for several years before needing attention. | High; often needs annual top-ups to keep joints filled. |
Using a Plate Compactor to Set Pavers
After the initial sand filling, you must use a plate compactor. This tool vibrates the sand deep into the joints and seats the stones firmly.
Always use a protective mat. Place a sheet of plywood or a special rubber pad over the surface first.
This mat prevents the compactor’s plate from scratching or chipping the finished stones. Run the machine over the entire area in slow, overlapping passes.
The vibration forces sand downward and settles any minor high spots. This step is critical for achieving a perfectly level and locked surface.
You will see the sand level in the joints drop after compaction. This is normal and expected.
Misting and Curing for Long-Lasting Results
Once joints are filled and compacted, the misting process begins. Lightly spray the entire surface with a fine mist of water.
This water activates the polymers in the sand. They begin to bind the grains together, creating a hardened joint.
Follow the manufacturer’s instructions precisely for the amount of water. Typically, you mist until the sand changes color, indicating saturation.
Avoid over-wetting. A heavy spray can wash the sand out of the joints or cause a hazy residue called efflorescence on the stone surface.
Before misting, sweep any excess dry sand off the pavers. A clean, dry broom works well for this final cleanup.
After the initial mist, you may need to repeat the sand-filling and compaction cycle. Add more sand to any joints that appear low and compact again.
Then, apply a second, lighter misting. This ensures every gap is completely and permanently filled.
The curing time is crucial. Most products require 24 to 48 hours before allowing foot traffic.
For driveways or areas with vehicle traffic, wait at least 72 hours or as the instructions specify. Keep the area dry during this period.
This final step transforms your project from loose stones into a unified, durable surface. It is the key to a patio that resists shifting, weeds, and the elements for a long time.
Conclusion: Enjoying a Durable, Sink-Free Patio for Years to Come
The true reward for your effort is a sink-free patio surface that will remain stable through seasons and weather. Your multi-layer drainage system ensures proper water management and a solid base.
This project yields a durable outdoor living space. It resists shifting and pooling water for many years.
Routine maintenance is simple. Sweep the surface and check the sand in the joints annually. Reapply polymeric sand when needed to keep everything locked tight.
Occasional sealing can protect your pavers from stains. It also enhances their color.
Your investment in correct techniques pays off with reduced repair needs. This patio adds value and enjoyment to your home.
Share your results or seek further DIY inspiration. Enjoy your new, professional-grade outdoor room.