

Installing modern retaining wall blocks requires five critical steps for success. You’ll start by measuring and preparing your site, including marking utilities and evaluating drainage needs. Next, establish a level foundation with compacted gravel base. Set your initial course of blocks with precise alignment, then build subsequent layers using a running bond pattern. Ultimately, install proper drainage systems and secure capstones. Following these proven techniques will transform your slope into a lasting topographical feature.
Planning and Site Preparation
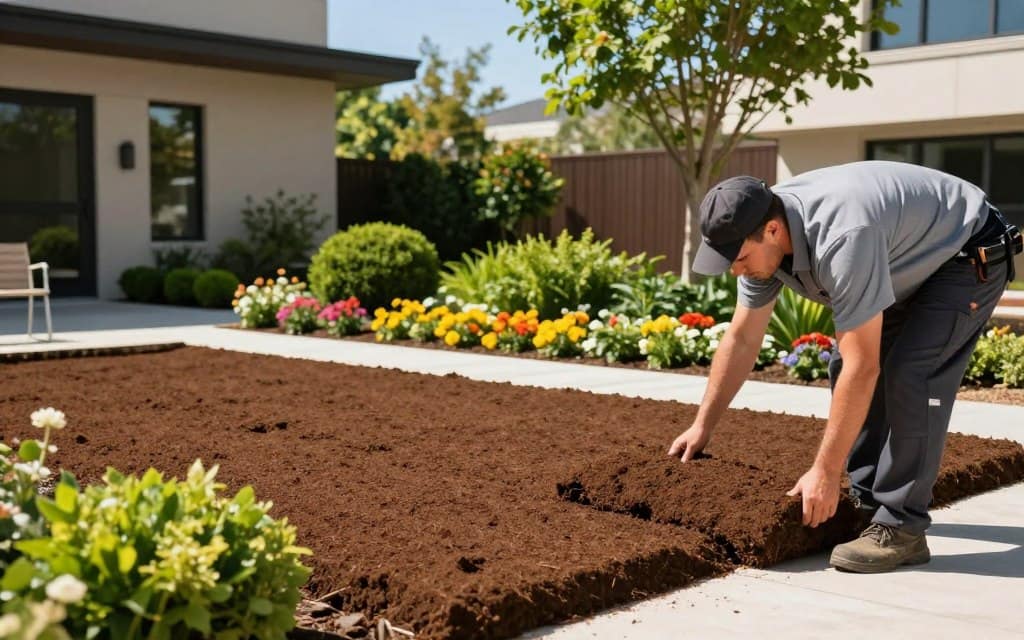
Three key steps define successful retaining wall preparation: measuring the site, marking utilities, and evaluating drainage needs. Begin with a thorough site assessment, taking precise measurements of the wall’s length, height, and desired setback angle. You’ll need to factor in soil conditions and slope calculations to determine proper foundation depth.
Contact your local utility companies to mark underground lines before any excavation. This critical safety step prevents costly damages and guarantees compliance with building codes. Next, evaluate your drainage requirements based on soil type and local rainfall patterns. Your material selection should align with both aesthetic preferences and structural demands – consider block size, weight, and interlocking mechanisms. Calculate the quantity needed, including extra blocks for cuts and curves, then organize proper delivery access to your prepared site.
Establishing the Base Foundation
A solid foundation forms the critical backbone of any retaining wall’s long-term stability. You’ll need to excavate a trench that’s twice the width of your blocks and at least 6 inches deep, plus an extra inch for every foot of wall height. Fill this trench with 4 inches of crushed stone or gravel as your base materials.
Using proper leveling techniques, compact the base materials with a plate compactor, making multiple passes until you achieve a firm, even surface. Check for level in all directions using a builder’s level or laser level. You’ll want to maintain a slight pitch of 1 inch per 8 feet, sloping away from the wall to guarantee proper drainage. Add or remove base materials as needed until you’ve achieved perfect levelness across the entire foundation.
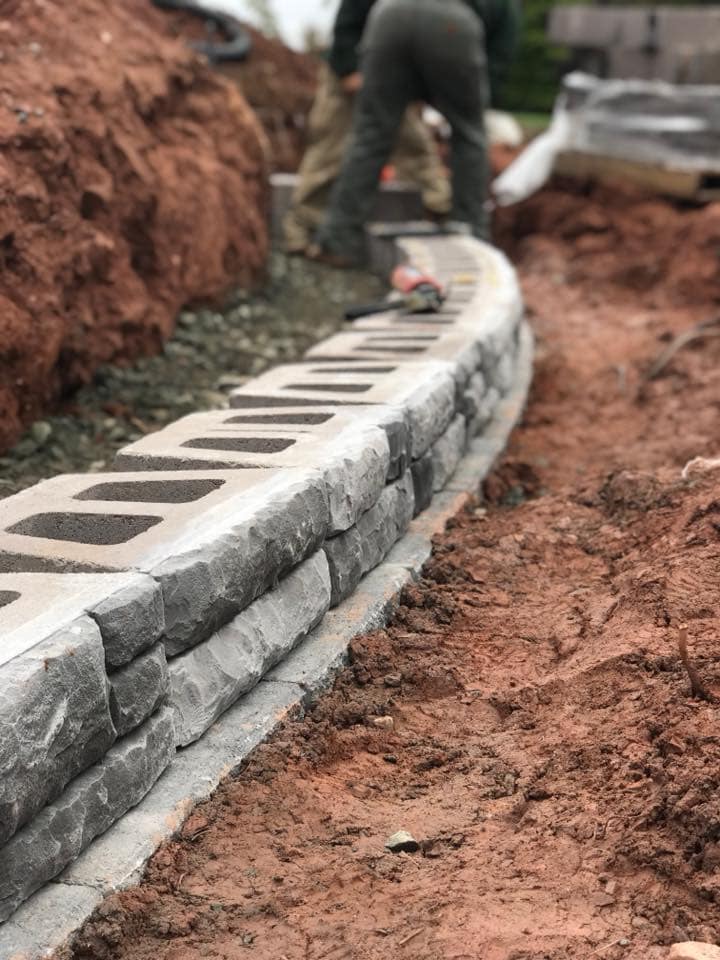
Setting the First Course of Blocks
Setting your primary course of blocks requires careful attention to detail, as this row establishes the alignment for your entire wall. Begin with block selection, choosing units that are clean and free from damage. Place your initial block at the lowest point of your slope, ensuring it’s level both front-to-back and side-to-side.
Use precise leveling techniques as you progress: lay each block tight against its neighbor, checking with a level and string line to maintain perfect alignment. If you encounter slight variations, adjust the base material beneath blocks rather than using shims. Don’t rush this process – take time to verify each block’s position before moving to the next. Remember to sweep the tops of blocks clean before proceeding, as debris can affect the stability of subsequent courses.
Building Subsequent Layers With Proper Alignment
Once your initial course provides a solid foundation, you’ll begin stacking supplementary layers of retaining wall blocks. Offset each new row by half a block to create a running bond pattern, which improves structural stability. Check layer alignment continuously using a string line stretched between end blocks to maintain a consistent face angle.
Before placing each block, sweep the previous layer clean and apply a thin layer of construction adhesive. Position blocks firmly against each other, eliminating gaps that could compromise wall integrity. Use a rubber mallet to adjust block leveling, and verify with a 4-foot level across multiple blocks. For curved walls, maintain consistent spacing between blocks on the curved sections while following your predetermined radius. Remove excess adhesive immediately with a putty knife to promote a clean, professional appearance.
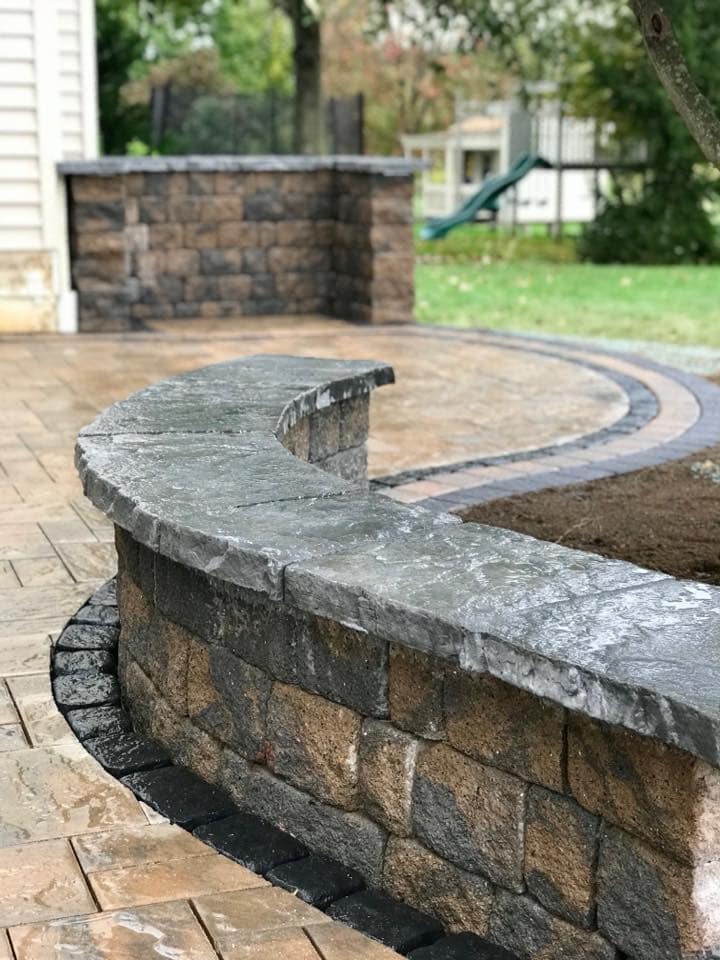
Finishing Touches and Drainage Installation
Three critical finishing steps guarantee your retaining wall’s longevity and proper function. Initially, install a perforated drainage pipe behind the wall’s base, surrounding it with gravel to prevent soil saturation. You’ll need to verify the pipe slopes properly to direct water away from the structure. Secondly, apply drainage solutions like filter fabric between the backfill and gravel to prevent soil migration while allowing water flow. Ultimately, add aesthetic improvements by securing capstones with concrete adhesive and implementing outdoor features around the wall’s perimeter.
Create weep holes every 6 feet along the base to facilitate proper drainage. If you’re working with a wall higher than 4 feet, consider installing supplementary drainage tiers at differing heights. Remember to test the drainage system before completing your final outdoor touches.
Frequently Asked Questions
How Long Does a Properly Installed Retaining Wall Typically Last?
You’ll find that a properly installed retaining wall can last 50-100 years when you follow essential maintenance tips. The durability factors that impact longevity include drainage efficiency, soil conditions, and material quality. To enhance lifespan, you’ll need to inspect for cracks annually, clear drainage systems, and repair any displaced blocks promptly. Professional installation with high-quality concrete blocks and proper water management greatly extends your wall’s service life.
Can Retaining Wall Blocks Be Painted or Stained After Installation?
Yes, you can paint or stain retaining wall blocks, but you’ll need to use specific products designed for masonry surfaces. For paint options, choose breathable masonry paint or elastomeric coating that won’t trap moisture. When considering staining techniques, opt for penetrating concrete stains that bond with the block’s material. You’ll want to thoroughly clean the surface initially and apply a masonry sealer afterward to protect your finished work from weathering.
What Permits Are Required Before Building a Retaining Wall?
You’ll need to check your local building department for specific permit types and zoning regulations, as requirements vary by location. Generally, you’ll need a building permit for walls over 4 feet high or any wall that supports a structure or slope. Don’t forget to contact utility companies for underground service marking. Some areas also require engineered drawings, soil tests, and drainage plans before they’ll approve your permit application.
How Much Does Professional Retaining Wall Installation Typically Cost per Square Foot?
You’ll typically pay between $25 to $50 per square foot for professional retaining wall installation, though costs can vary considerably. Materials like concrete blocks run $15-20 per square foot, while labor adds $10-30. Complex projects with challenging terrain or premium materials like natural stone can push costs up to $75-100 per square foot. Height, soil conditions, and drainage requirements will also impact your final price. Always get multiple contractor quotes for accurate pricing.
Are Curved Retaining Walls More Expensive Than Straight Ones to Build?
Yes, curved retaining walls typically cost 15-25% more than straight walls due to several cost factors. You’ll need to account for extra labor since curved design requires more precise cutting and fitting of blocks. You’ll also face higher material costs because curved walls require more blocks to maintain proper spacing and stability. Furthermore, you’ll often need specialized curved blocks or will have to cut standard blocks, which increases both time and waste.